
WordPress websites first noticed the light of day on May 27, 2003. The creators of this software are Matt Mullenweg and Mike Little. WordPress can be directed to as an online, open-source site-building tool founded on PHP and MySQL programming languages. In more progressive terms it is named a content management system (CMS).
WordPress is an open-source Content Management System (CMS), which permits users to build dynamic websites and blogs. WordPress is the most famous blogging system on the web and allows updating, customizing, and handling the website from its back-end CMS and elements.
What is Content Management System (CMS)?
The Content Management System (CMS) is software that keeps all the data such as photos, music, documents, text, etc., and is created and available on your website. It assists in editing, publishing, and changing the content of the website.
WordPress was originally released on 27th May, 2003 by Matt Mullenweg and Mike Little. WordPress was declared as open source in October 2009.
WordPress.org vs WordPress.com: What’s the Distinction?
When most people direct to WordPress, they are speaking about self-hosted WordPress, or WordPress.org. This should not be confounded with WordPress.com.
While both of these utilize the WordPress software, the features and abilities of each couldn’t be more distinct.
Still confused? Let me clarify.
WordPress.com is a service that enables you to use WordPress software, whereas WordPress.org is the software itself. With WordPress.com, you are restricted in your selection of hosting and the features you have at your disposal.
Whereas with WordPress.org, you have full freedom over every element of your website. For this reason, WordPress.org is by far the most famous option and is what we will be addressing in this tutorial.
Advantages
- It is an open-source platform and is available for free.
- CSS files can be adjusted according to the design as per users’ requirements.
- Media files can be uploaded efficiently and quickly.
- It offers several SEO tools that make on-site SEO simple.
- Customization is straightforward according to the user’s needs.
- It permits the creation of various roles for users for the website such as author, admin, editor, and contributor.
- There are numerous plugins and templates available for free. Users can customize the different plugins as per their need.
- It is very straightforward to edit the content as it uses WYSIWYG editor (What You See Is What You Get is a user interface that allows the user to straight manipulate the layout of document without having a layout command).
Setting Up WordPress
In the following steps, we’ll guide you on how to install WordPress, examine the tools within the dashboard, and step you through the steps to create content, style your site, and make it live. Once you finish these steps, you’ll see why WordPress is excellent for beginners.
Step 1: Installing WordPress
There are a few methods to install WordPress, including operating a hosting provider, manually installing it yourself, or locally utilizing Local by Flywheel or MAMP Pro. In this tutorial, we’ll show you how to install WordPress utilizing SiteGround’s Site Tools dashboard.
Install WordPress via SiteGround
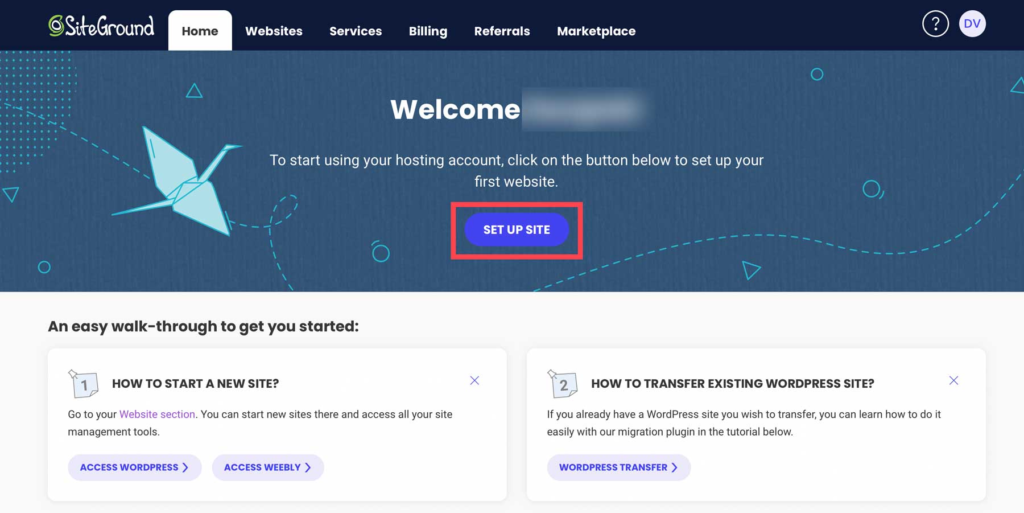
After signing up for a SiteGround account, you can smoothly install WordPress in only a few clicks. Begin by clicking the setup site button at your screen’s top center.
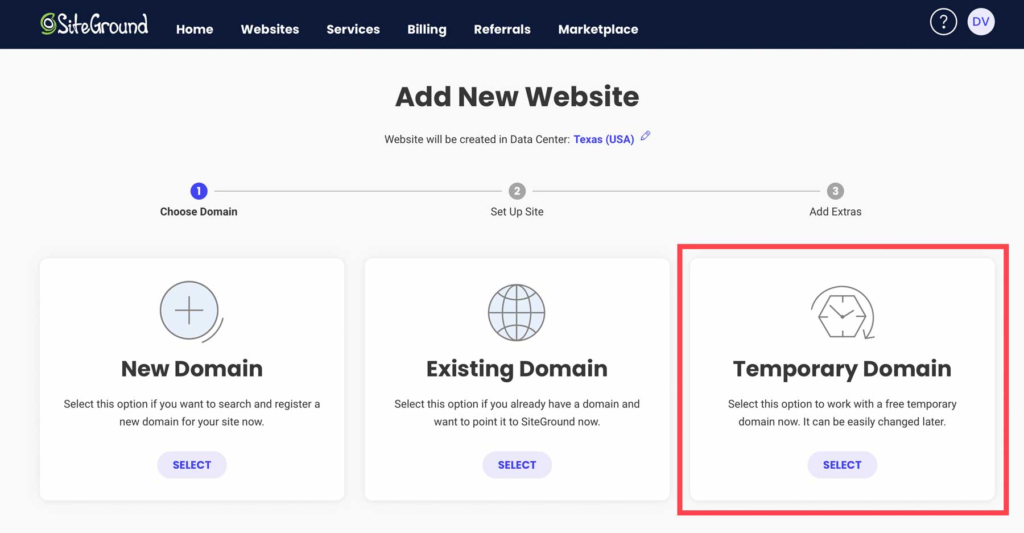
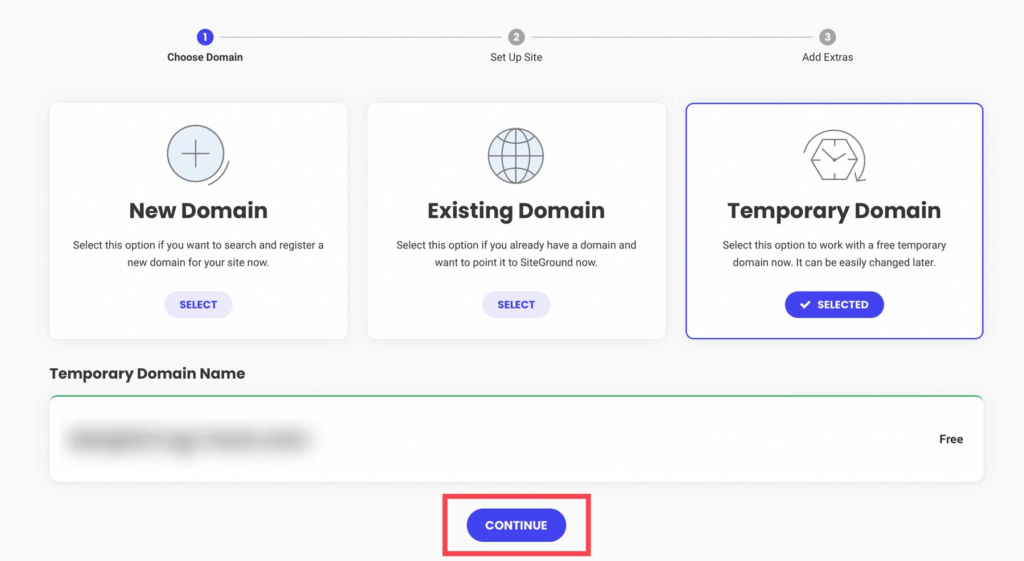
Next, select whether to set up your site on a new, existing, or temporary domain. Set temporary domain, then click continue.
SiteGround will give a temporary domain to your WordPress install. To move, click continue.
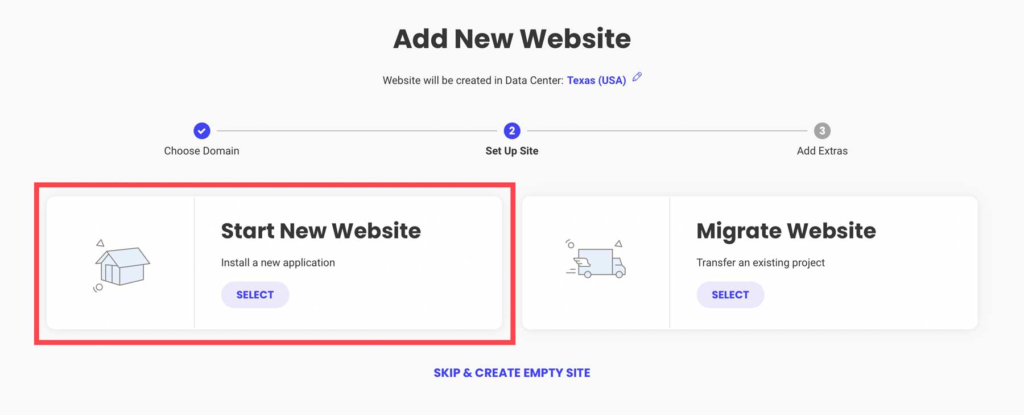
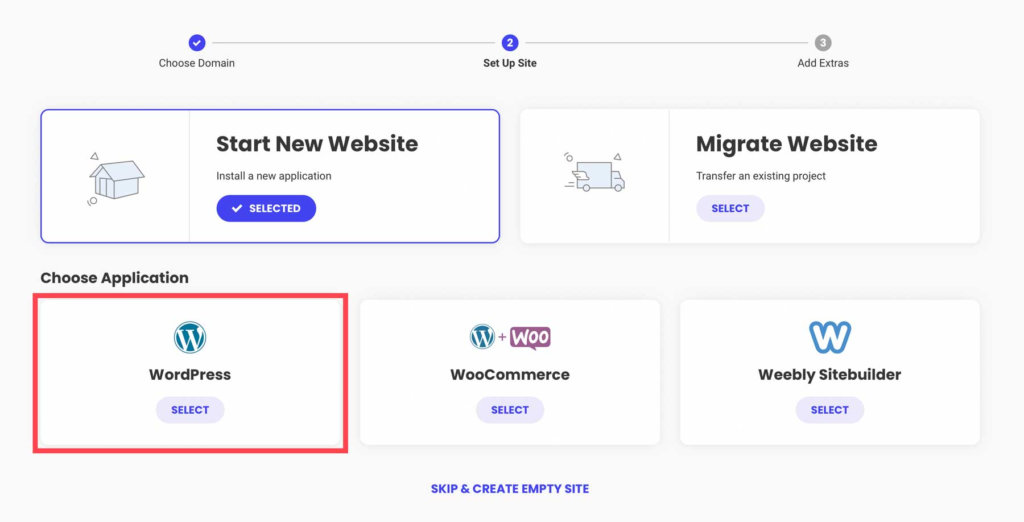
After that, click start new website.
Select WordPress.
The next step authorizes you to make your login credentials. This is how you’ll log in to your WordPress dashboard when operating on your site. Be certain to write down or save your login details for reference. Click continue to move to the next step.
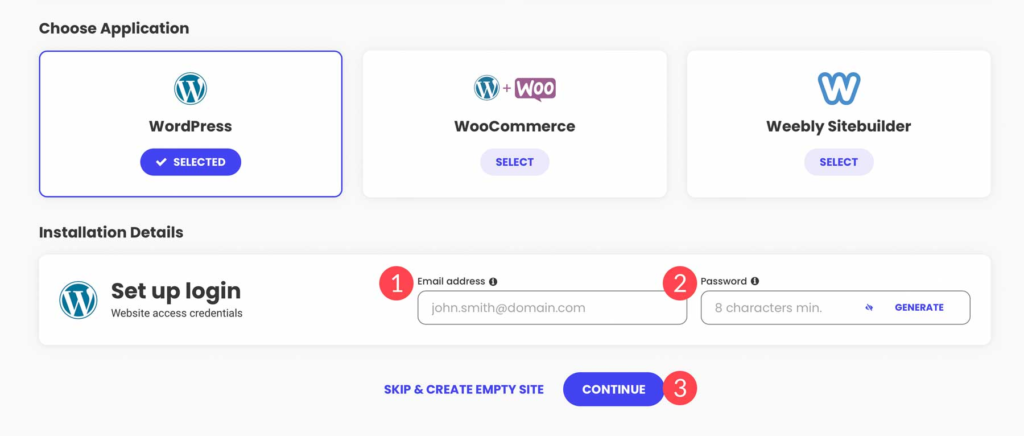
Finally, click the finish button to install WordPress.

You have two options for accessing the WordPress dashboard. Through SiteGround, you can click on the log in admin button.
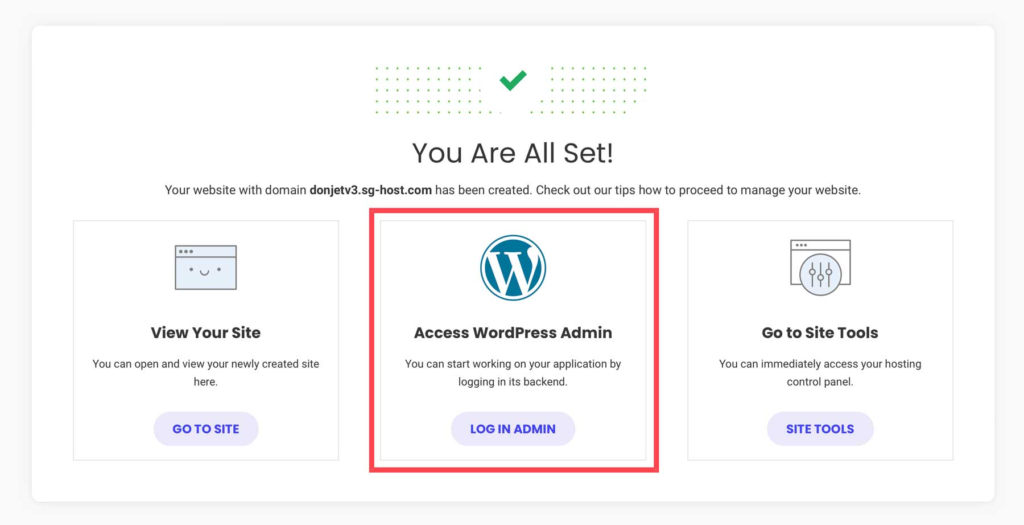
Another method to log in to WordPress is through the CMS by navigating to www.yoursite.com/wp-admin in your browser. Be confident to replace www.yoursite.com with your exceptional domain.
Step 2: WordPress for Beginners –
Dashboard
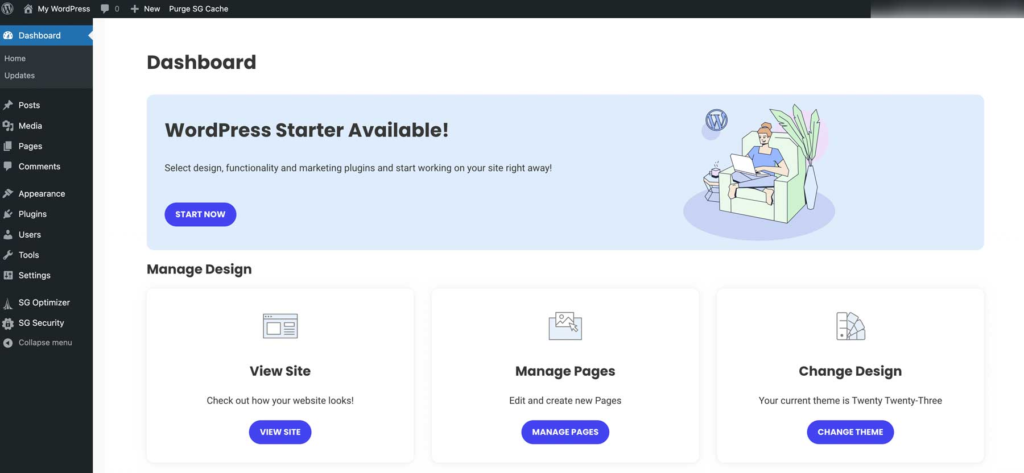
Upon logging in for the first time, you’ll see the WordPress toolbar on the left-hand side of the screen. It has all the tools and settings you’ll require to start building your site. The main dashboard screen contains quick links for viewing or handling pages, useful links, editing the design of your site, and WordPress-related blog posts.
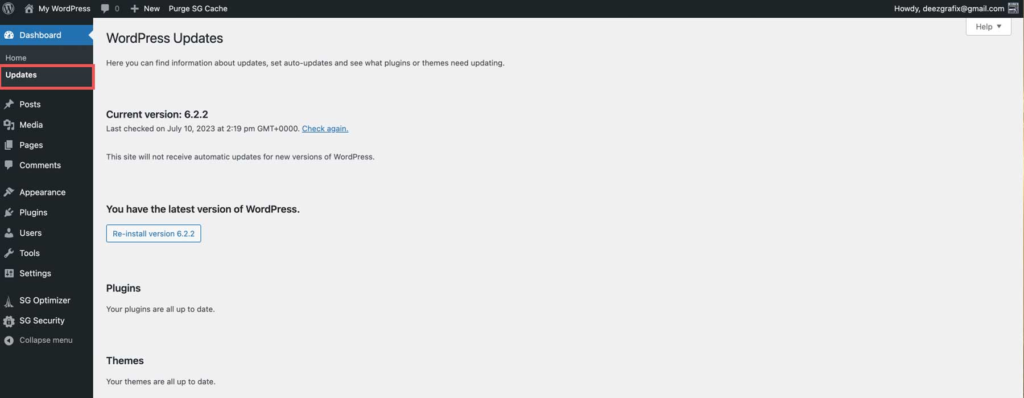
The following tab, Updates, permits you to review any plugins, themes, or core files that require to be updated. You must keep the software updated for functionality and safety. Otherwise, your site could fall prey to hackers, or at the very least, pause. When launching on updating plugins, themes, or WordPress core, be confident to make a backup of your website in case you encounter any problems.
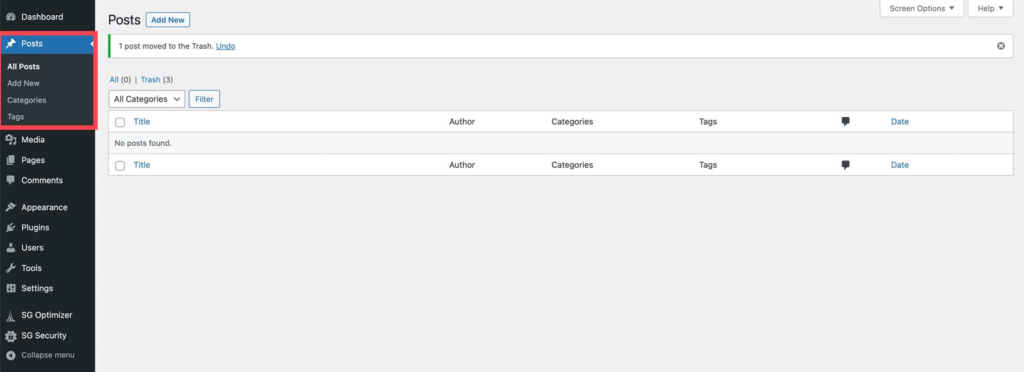
Posts
The next tab is for posts. Here you can make new posts or edit existing ones. You can also set up your blog’s types and tags, which is excellent for keeping your content organized, assists with SEO, and makes it straightforward for your users to discover what they are looking for.
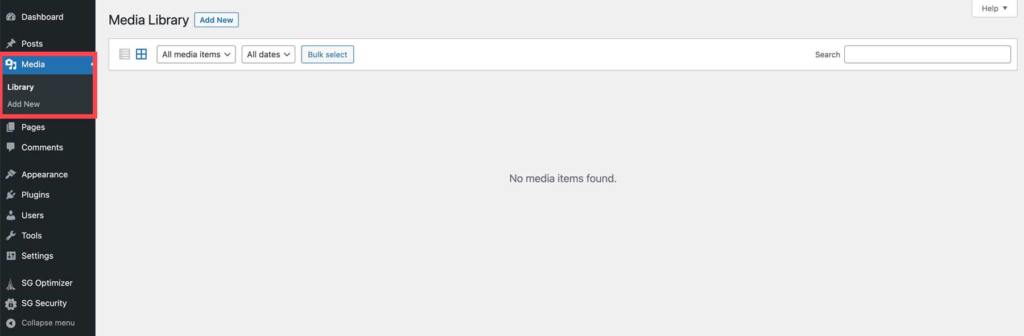
Media
WordPress comes with its own media library, where you can add and edit photos for your website.
Pages
The next set of tools authorizes you to add pages to your website. Although pages are made much like posts, there are some distinctions. These pages will emerge in the main navigation, letting visitors browse your content easily. Another distinction is that posts allow categories and tags, whereas pages do not.

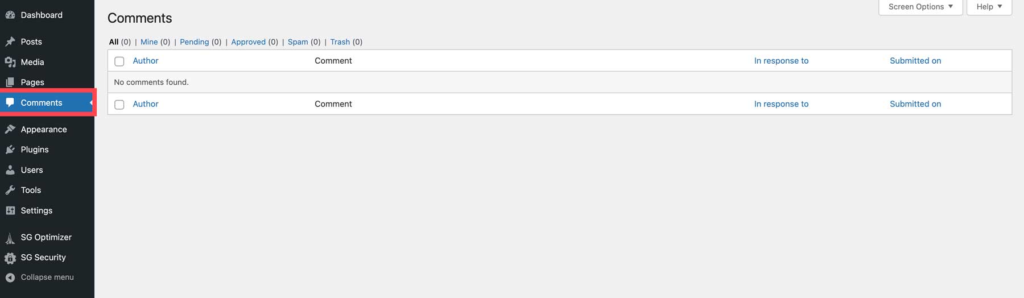
Comments
The next setting for WordPress is comments. When you publish posts on your website, WordPress automatically delivers a comment section to each post. Your site’s visitors can add remarks to your posts, delivering interest for other readers and a possibility for you to increase engagement. However, comments are only useful if you take the crucial steps to moderate them effectively..
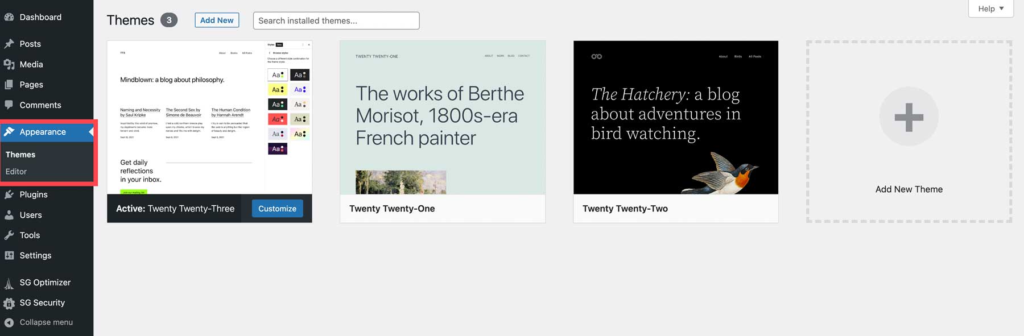
Appearance
Some of the most useful tools in WordPress are included within the Appearance tab. Here you can install themes, add widgets to display critical information, customize them, create navigation menus, and more. Depending on which theme you decide to use, these tools will vary. If using a full site editing block theme like Twenty Twenty-Three, you are limited to themes and editors. Premium WordPress themes, such as Divi, typically have more options, including the capability to edit your theme’s files.
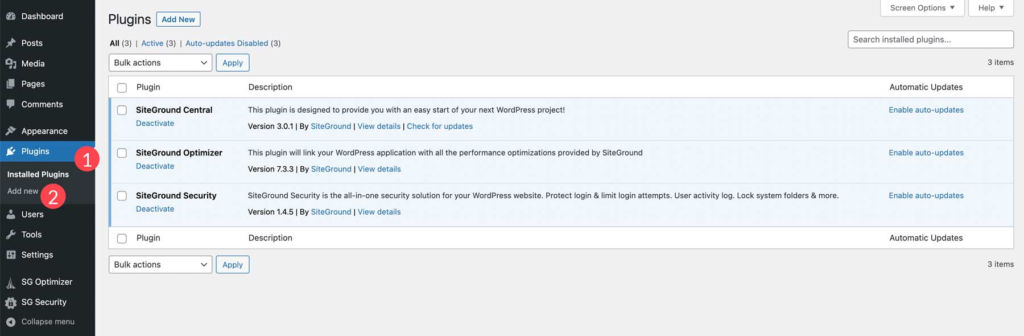
Plugins
WordPress delivers the extendability of its platform through the benefit of plugins. They authorize you to add functionality, such as following your site’s performance, chatting with visitors, or hundreds of other tasks. The plugins tab displays a list of plugins presently installed (1) on your website. You can view, manage, or delete plugins as required. The Add New (2) option allows you to search for and install new plugins available in the WordPress storage or install new ones in a few clicks. Relying on the theme you have installed, a plugin editor option lets developers make coding modifications to activated plugins.
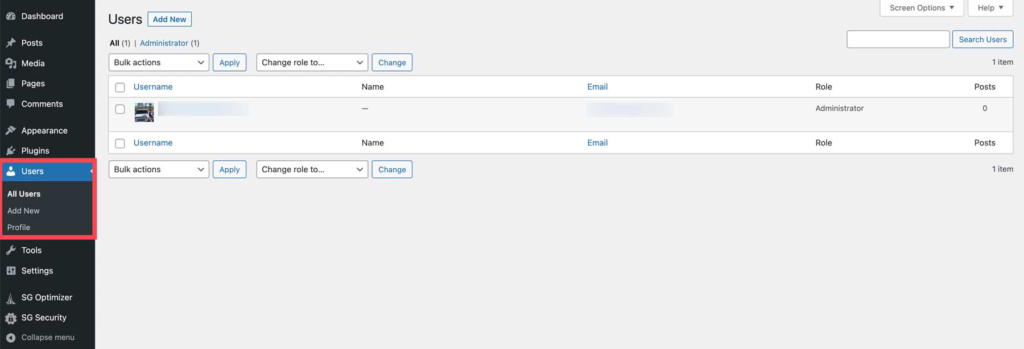
Users
The all-users section of the WordPress dashboard lets you handle your site’s users. You can add, edit, or delete users and determine their roles and approvals. The profile option allows you to edit each user’s gravatar image, bio, and contact details.
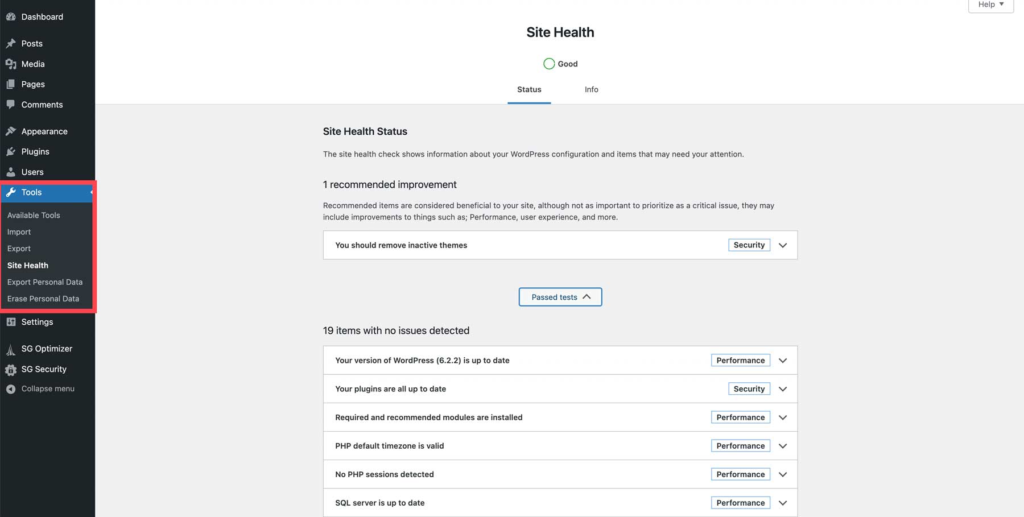
Tools
The tools section of the dashboard offers features to handle and maintain your site. You can browse available tools, and pages, import or export WP posts, and media through an XML file, monitor your site’s safety and performance, and export or erase users’ data to maintain GDPR compliance.
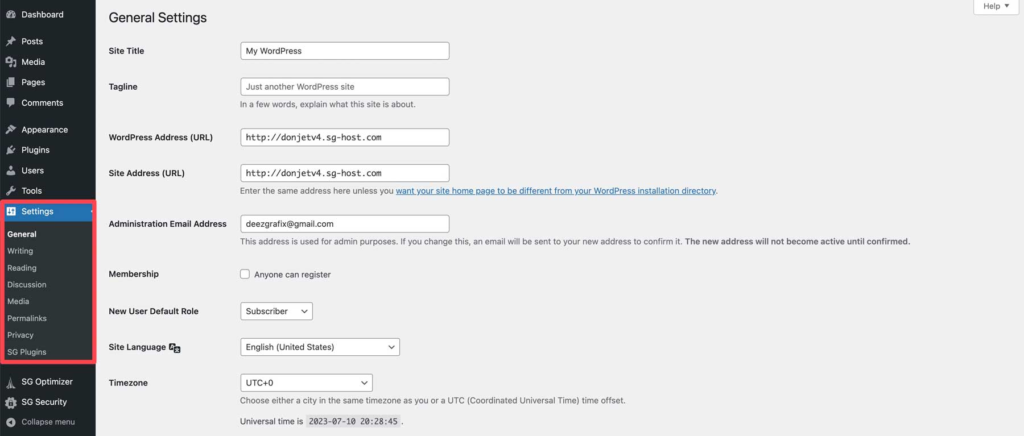
Settings
The WordPress settings section lets you set your site’s title and tagline, set default media sizes, set a home page, set privacy, and more. These settings are too complicated to go into here, so we’ve linked some useful articles below to walk you through the steps.
Step 4: Installing WordPress Themes
WordPress themes influence the appearance and certain parts of your WordPress site. While some are multipurpose and can be utilized on any website, others are purpose-built and quality templates for eCommerce or portfolio websites, for instance.
To install a WordPress theme, access the Appearance section, click the Add New Theme button, and explore for the best free WordPress themes. You can even filter themes by features and shades.
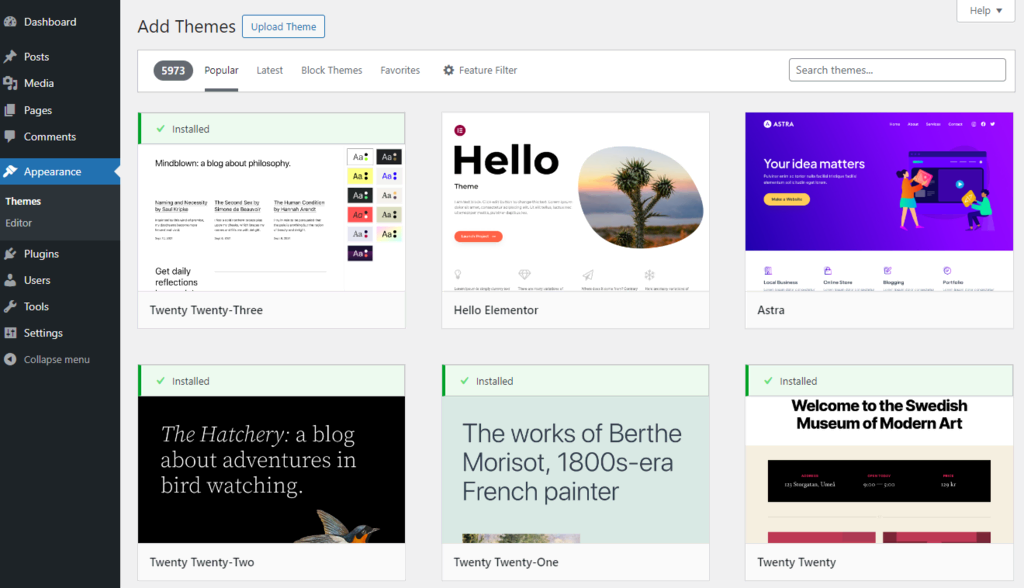
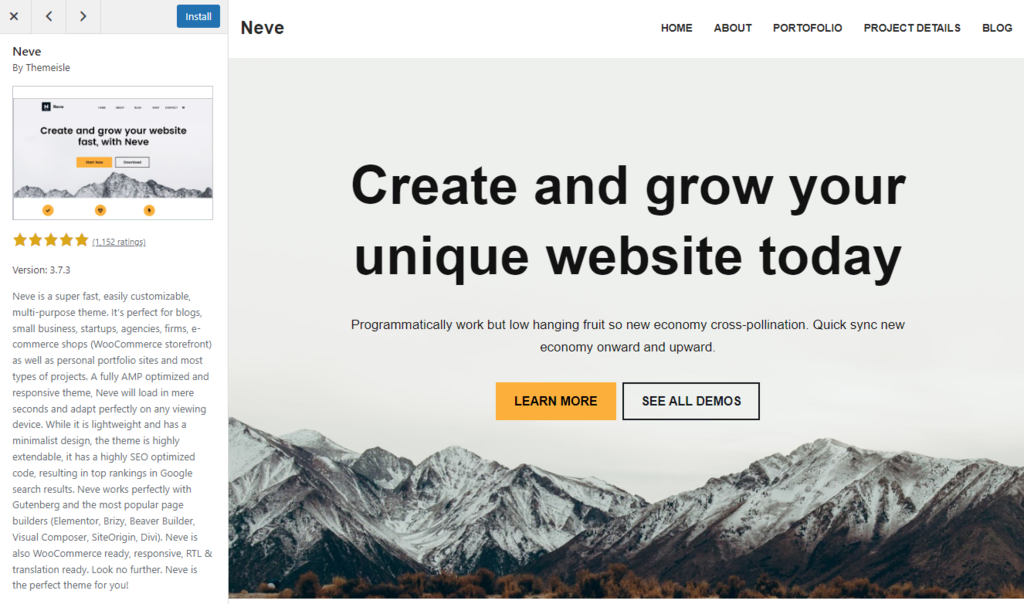
The preview feature lets you glimpse how the website will look utilizing the chosen theme. This can prevent you from installing numerous themes just to find which one suits your needs. Once you choose, click Install and then Activate the theme.
If you bought a premium theme from a third-party platform, you must manually upload the theme files.
Access the exact Appearance section, push the Upload Theme button, and choose the theme’s .zip file. It can take up to a few minutes for the uploading procedure to finish. Once it’s done, Activate the theme.
Step 4: WordPress for Beginners – Plugins
The next step in the procedure is installing some plugins. How many you require or what they will do relies on the niche you’re going for. Thousands of plugins are available through WordPress storage and third-party vendors, such as the Divi Marketplace, so the sky is the limit.
Every website should have a few important plugins in place to guarantee the safety and security of its consumers. That’s why there is an important list of plugins that will offer you everything you need for your WordPress website on our blog.
Installing a WordPress Plugin
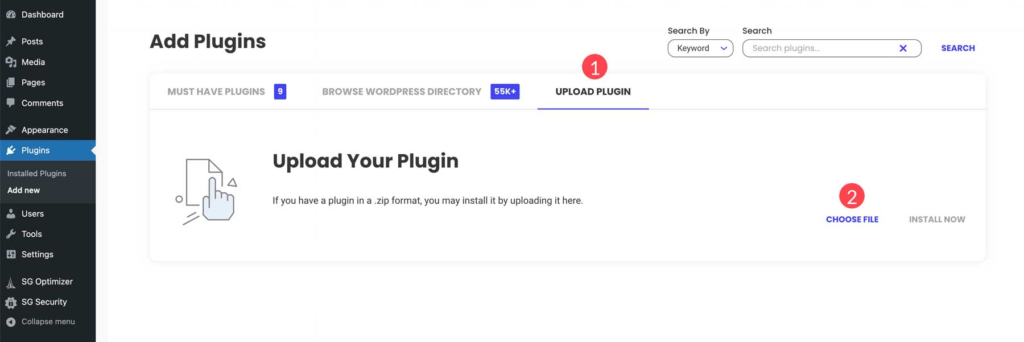
Equivalent to themes, there are two methods to install a plugin: exploring within WordPress or uploading a premium theme. First, navigate to Plugins > Add New.
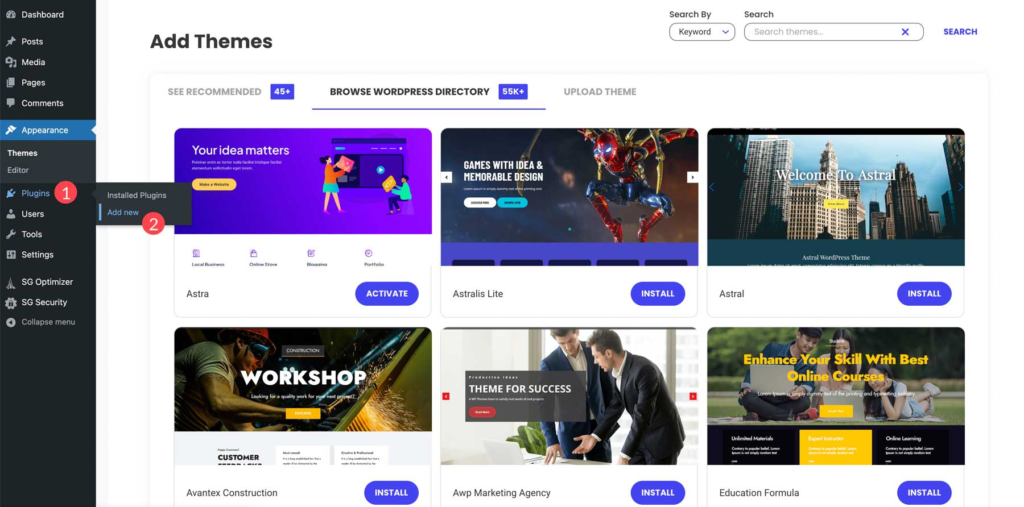
The steps to installing a plugin from the WP guide are comparable to installing a theme. Search or browse for the plugin of your preference, then click install to download the plugin.

Click the upload plugin tab to upload a plugin, then select file.
We’ll select the Divi Builder plugin from our computer and upload it to WordPress. Once uploaded, click install now.
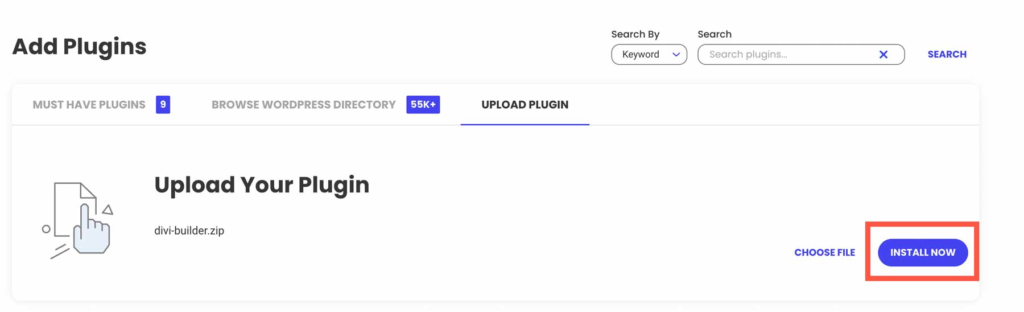
To finish the installation, start the plugin.
Step 5: Publishing Content
Building a WordPress website involves publishing a new post or page. Pages are mostly used for static, undated content – Contact Us or About are suitable examples of pages.
On the other hand, WordPress posts are utilized to publish time-sensitive content and can be classified, tagged, and archived.
Creating a New Post
To start a new WordPress post, navigate to Posts → Add New Post from the dashboard’s left sidebar or select the New → Post option on the top toolbar.
You will be presented with an editing screen with different posting features. The first step is entering a title for your blog post.
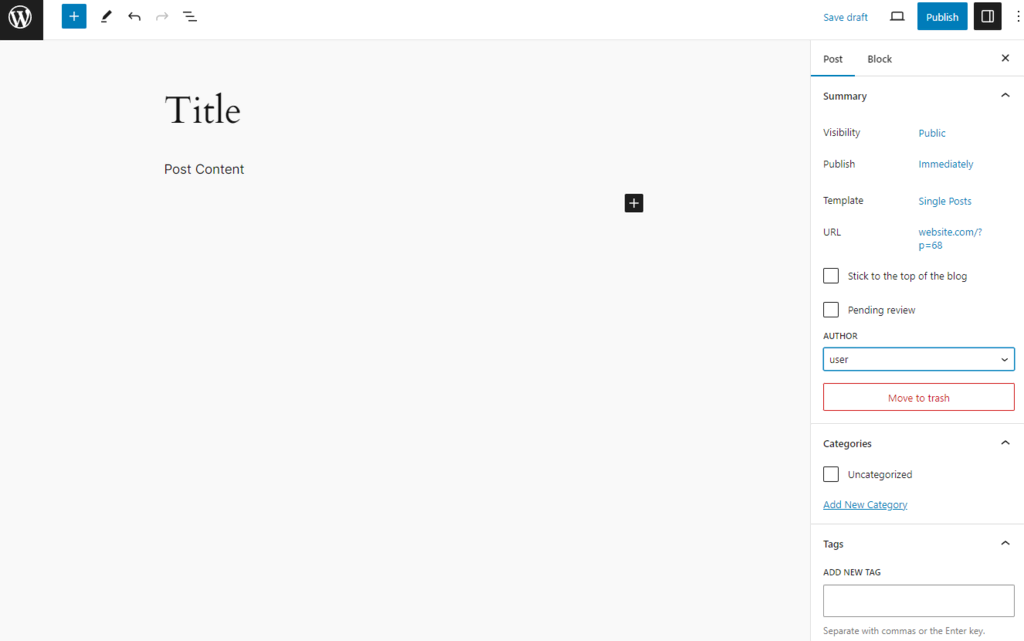
Next, enter the exact content of the blog post operating WordPress blocks. If you like to format the text, utilize the block toolbar options.
The post settings panel is on the right side of the screen, with each section serving a special function:
- Categories. In this box, you can delete, add, or edit the post category.
- Tags. This box allows you to add new tags fast.
- Featured Image. You can set a featured image, which will be visual at the top of the post.
- Post Summary. Modify the status and visibility of the post and schedule it. To make the blog post sticky, choose the Stick to the top of the blog option.
To publish the post, click the Publish button at the top-right corner of the editor screen.
Step 6: WordPress for Beginners – Customization
Before you take your site live, there are a few last-minute points that you should take care of, including adding any custom CSS, configuring SEO, adding social media, and configuring your theme’s settings. These choices will vary depending on the theme installed.
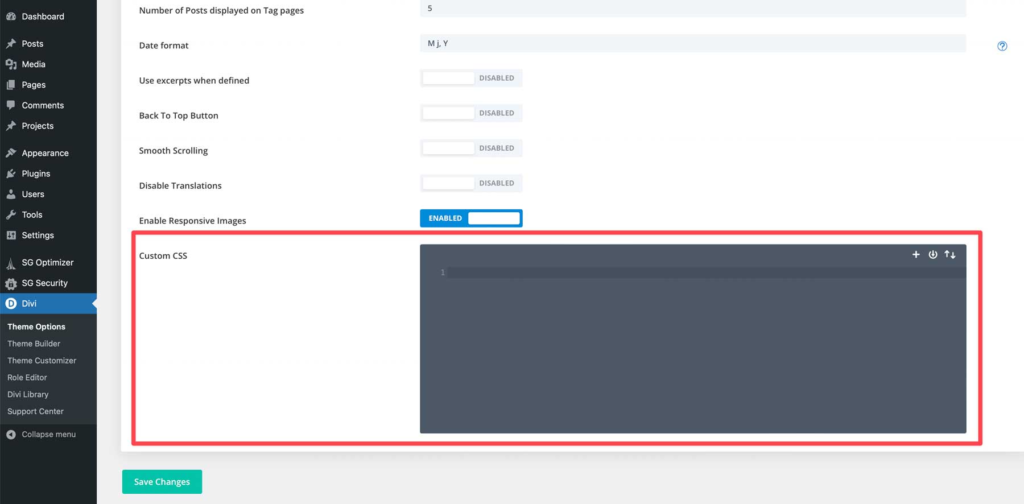
Adding Custom CSS
You can add custom CSS to style various elements of your website. Relying on the theme, there are a few places to add your snippets. The first method is through the WordPress customizer. More basic themes will offer this opportunity in Appearance > Customize. For premium themes like Divi, you can add custom CSS in Divi > Theme Options.
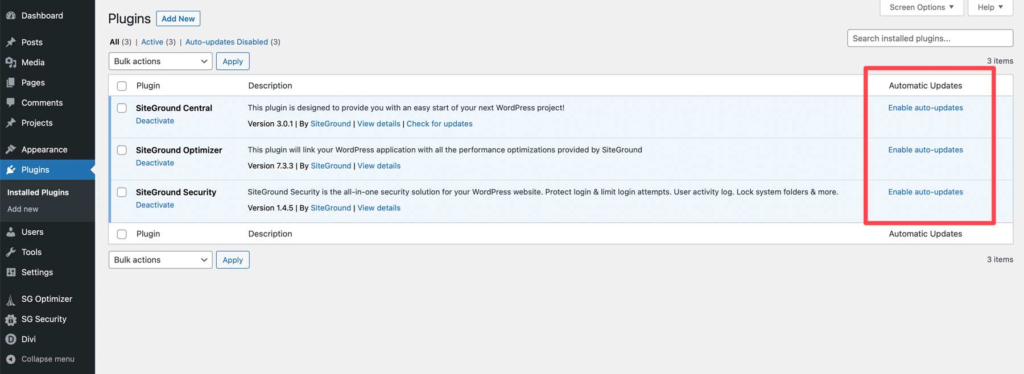
Auto-Update Plugins
WordPress has built-in functionality that lets you to turn on automatic plugin updates. The downside to this is facing a problem during a plugin update. You might not understand what went wrong if you aren’t handling updates yourself. Using an activity log plugin will provide you more transparency into what went wrong so you can troubleshoot the problem more easily.
To enable auto-updates, navigate to the WordPress dashboard’s plugins section. Click enable auto-updates on any plugin you’d like to update.
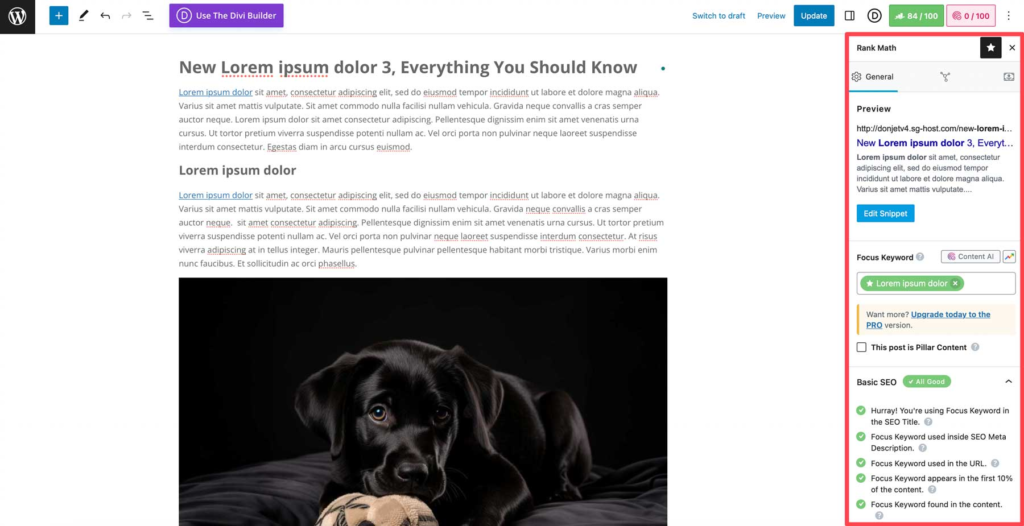
Configure Your SEO
One of the most essential last steps before establishing your website is configuring its SEO settings. Employing an SEO plugin such as Rank Math is a perfect option. It offers a step-by-step method that guides you in performing better SEO scores using helpful tips and advice.
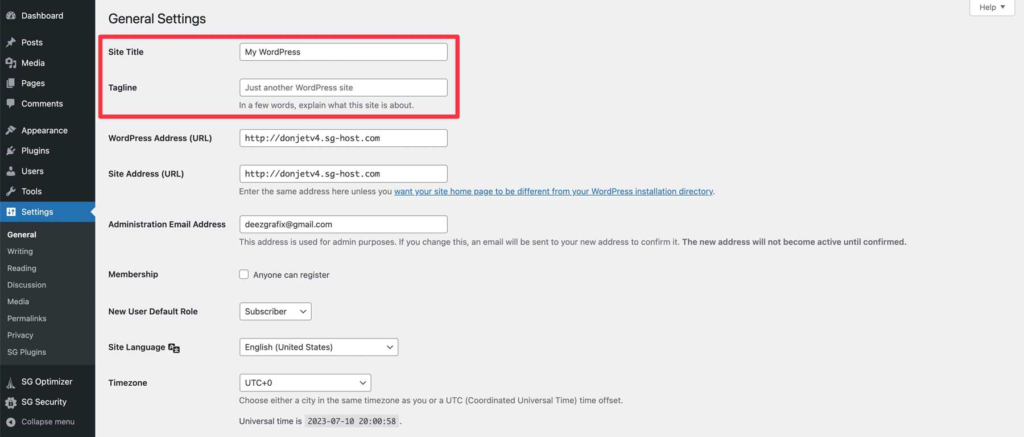
Add a Site Title and Tagline
Your site’s title is utilized to help visitors recognize the website they are browsing. The tagline is a short description of your website. It’s best to use a unique title and tagline rather than duplicating the title, as it provides a more accurate depiction of what your website is about. To modify these, navigate to Settings > General. From there, input your preferred title and tagline, then save your modifications.
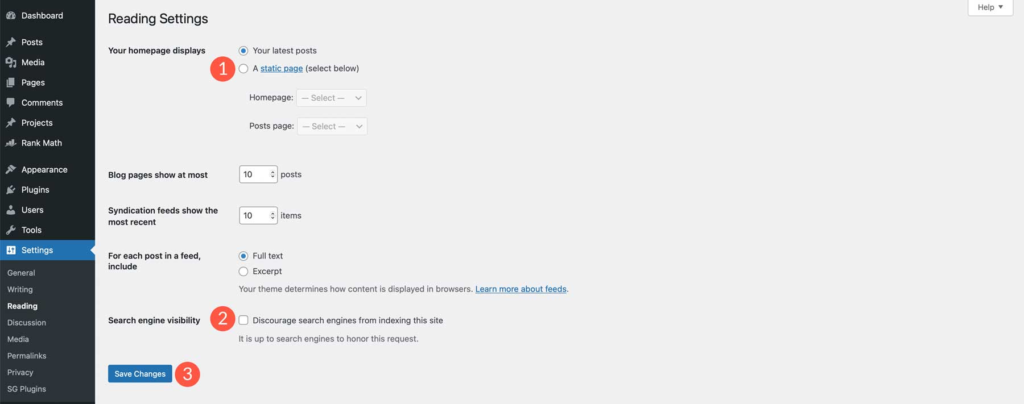
WordPress Reading Settings
There are two essential things that you should do here, including setting a home page (1) and guaranteeing the Discourage search engines from indexing this site checkbox is unchecked (2). You can display your latest posts on the home page or select a static post or page. When the discourage checkbox is ticked, search engines block your site from being indexed, so you’ll like to leave that unchecked before launching. Save your modifications when finished (3).
Configure Theme Settings
Before bringing your site live, you like to represent your business appropriately. Add your logo, social media accounts, shade, and fonts. Every theme is distinct; most allow you to complete these tasks in their theme settings. Employing Divi, navigate to Divi > Theme Options. Here, you can add all essential branding elements and make other required changes.

Back Up Your Site
The last and most crucial step before pushing your site live is to back up your website. By assembling a backup, you’ll keep your site’s files in case of a misstep in the launch procedure. Most managed hosting providers, such as SiteGround and Cloudways, present backups in their hosting plans. However, relying on the host, you might need to install a good backup plugin.
Step 7: WordPress for Beginners – Taking Your Website Live
The last step in the procedure is to take your website live. Since we created our site on a temporary domain utilizing SiteGround, you’ll need to add a domain first. If you created your site in a development environment, there are various steps to take.
Regardless of your hosting provider, there are a few items to check once your site is live:
- Test all forms. If you are having problems, you may need to install an SMTP plugin.
- Make a post-launch backup of your site to confirm the most recent iteration is secured.
- Connect your website with an SSL certificate. If utilizing SiteGround, follow these steps.
- Submit your XML sitemap to Google.
- Double-check all SEO metadata.
- Set up analytics and integrate it into your website using an analytics plugin.
- Perform a speed test for your website, and make any required speed enhancements.