With the new Minecraft 1.19 update, the game is now more complex and powerful than ever. We have new biomes, new mobs, and several new visual elements in-game. All of this sounds good in theory but can take a real toll on your PC’s performance. That’s where the OptiFine mod comes into the picture. It is one of the most popular Minecraft mods of all time and can help improve the game’s performance. If you know how to install the OptiFine mod in Minecraft 1.19, you can unlock the best FPS, detailed graphical settings, and more in this sandbox game. But let’s not get ahead of ourselves, and first, let’s learn how to install OptiFine for Minecraft 1.19.
Introduction to Optifine 1.19
Optifine 1.19 is a powerful Minecraft modification that enhances the game’s graphics and performance. Developed by a talented team of modders, Optifine adds a plethora of visual features and optimizations, allowing players to customize their Minecraft experience like never before. Whether you’re a casual builder or an avid adventurer, Optifine 1.19 has something to offer for everyone.
Read Also: How To Install OptiFine in Minecraft: Ultimate Guide
Installing Optifine 1.19: A Step-by-Step Guide
To take advantage of Optifine 1.19’s amazing features, you first need to install it correctly. Here’s a step-by-step guide to help you through the installation process:
- Visit the official Optifine website (https://optifine.net) and download the latest version compatible with Minecraft 1.19.
- Locate the downloaded Optifine file and double-click it to start the installation.
- Choose the “Install” option and let the installer do its magic.
- Once the installation is complete, launch the Minecraft launcher.
- In the launcher, select the Optifine 1.19 profile and click “Play” to start the game with Optifine.
How to Install OptiFine in Minecraft 1.19
Once the download is complete, it is easy to install the OptiFine mod in Minecraft 1.19. Follow the steps below:
1. To get started, open the downloaded “.jar” file. It will automatically launch itself in the Java compiler. Once it opens, double-check the installation location of your Minecraft directory. If you want to change it, you can use the ellipsis (three dots) button. Then, click on the “Install” button to continue.
2. When the installation is complete, click the “OK” button to close the installer. With that said, OptiFine is now a part of your Minecraft game.
3. To launch and use OptiFine in Minecraft 1.19, you have to run it from your Minecraft launcher. To do so, click on the version drop-down menu for your game (located to the left of the “Play” button) in your launcher. Then, select OptiFine from the list and click on the “Play” button.
Minecraft might warn you about the risks of modded installations while running OptiFine. If it does, make sure to check the box next to the “I understand the risks” statement and click the “Play” button.
Install OptiFine As a Mod
If you want to run OptiFine alongside other Minecraft 1.19 mods, you must install it as a mod as well. To do so, you just need to copy the downloaded “Optifine.jar” file and paste it into the “mods” folder of your Minecraft installation. If you can’t find the folder location, you can paste this address – %appdata%\.minecraft\mods in the Explorer address bar or the Run window (Win +R).
But keep in mind that this method only works if you already have Forge installed in your Minecraft. Moreover, OptiFine might not show up automatically in your list of mods if you check in the game. But that’s a common glitch, and well, the availability of more video options than regular Minecraft is the true indicator of OptiFine.
Read Also: Top Unblocked Premium Games Play For Free
How to Get High FPS in Minecraft 1.19
Now that you know how to install OptiFine in Minecraft 1.19, it’s time to make the most out of it and get the highest FPS in the game. To do so, you need to edit the “Video Settings” from the pause menu.
Basic Video Settings
In the main section of Minecraft’s video settings, you need to use the following configuration to get the best FPS:
- Graphics: Fast
- Smooth Lighting & Its Levels: Off
- Render Distance: 8-12 chunks
- Framerate: Same as your monitor
- Entity Shadows: Off
Other options, including GUI scale, bobbing, and brightness have little impact on the graphical performance of Minecraft. You can leave them unchanged and move to sub-sections to lower quality and improve performance even further.
Quality Settings
Quality settings have a high impact on your game’s appearance and performance. To get the highest possible FPS in Minecraft 1.19, it’s best to turn off every single feature under this settings section. But you can keep a few of them on as per your preference. All of them are bonus features and don’t affect the core gameplay.
Your game might restart multiple times while you change the quality settings. There is no need to panic as it’s merely a part of the process. After turning everything off, set the Mipmap type to Nearest. Then, click on “Done“ to save the settings.
Details Settings
The “details” sub-setting under the video settings majorly affects the way you experience Minecraft. The options on this settings page don’t affect your performance much, so you can edit them as per your preferences.
If getting the highest FPS is your main concern, you just need to set all values to “Off” or “Fast”. Doing so removes the feature completely or makes it negligible. Moreover, the “cloud height“, “held items tooltips”, and “fog start” options don’t affect graphical performance at all.
Not to forget, you should keep the entity distance between 75% – 125%. Otherwise, you won’t see dangerous mobs until they are too close to you. Then, once you are finished, click the “Done” button to save the settings.
Animation Settings
Animation settings are quite simple, and they heavily affect your performance. So, to get the highest FPS, you should just hit the “All OFF” button to set every animation off in Minecraft.
Performance Settings
As the title suggests, these settings directly affect your game’s performance. Here, you first need to make sure that only dynamic updates are turned off and everything else is on. Then, set the chunk updates to “5” and the chunk builder to “threaded”. Finally, click on the “Done’ button to save the settings.
Read Also: Crazy Games Unblocked: Fun and Free Gaming
How to Get the Best Graphics in Minecraft 1.19
With performance out of the gate, it’s time to use OptiFine in Minecraft 1.19 to push toward the best graphics. For that, we will be installing shaders in Minecraft 1.19. But before diving in, make sure your system is powerful enough to handle these add-ons.
You can use some of the best Minecraft 1.19 shader packs (in the works, coming soon), as per your preference. After downloading the shader file, place it inside the %appdata%\.minecraft\shaderpacks folder to use that shader pack in the game.
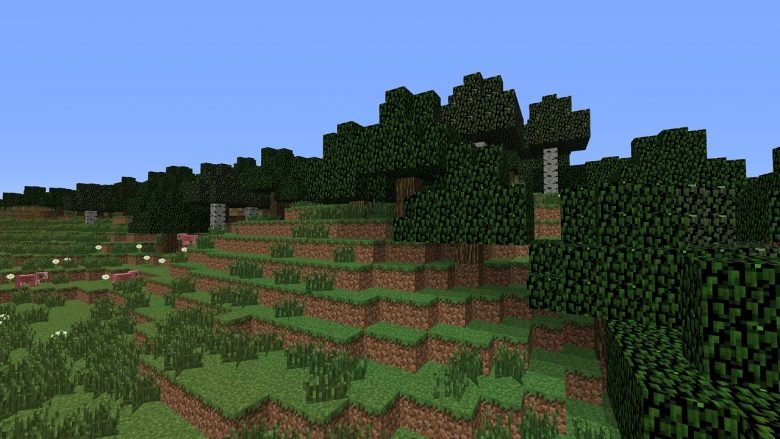
With shaders active, even the highest graphical settings of Minecraft appear basic. You get realistic shadows, amazing texture mapping, and good textures alongside dynamic lighting and natural particles. The above screenshot represents the difference very clearly.
Install OptiFine in Minecraft 1.19 to Improve Graphics
Whether you are a professional player looking for peak performance or a content creator searching for a way to get the best graphics, OptiFine for Minecraft 1.19 is all you need. And now that you know how to install this popular mod, it’s time to make the most out of OptiFine. For that, you have to install the best Minecraft shader packs. Most of them are compatible with the best Minecraft texture packs, which can help transform your game beyond imagination. Lastly, to find the perfect spots to check out these graphical changes, there is nothing better than our list of best Minecraft 1.19 seeds. Having said that, why are you installing OptiFine in Minecraft? Is it for graphics or performance? Tell us in the comments below!
Conclusion
Optifine 1.19 is a game-changer for Minecraft players who seek to elevate their visual experience. With its extensive range of features and optimizations, this mod takes Minecraft to new heights of visual brilliance. From improved performance to customizable visual settings and advanced effects, Optifine 1.19 offers a wealth of options to make your Minecraft world truly breathtaking.
So, what are you waiting for? Enhance your Minecraft experience with Optifine 1.19 and witness the game’s visual brilliance like never before!