
Are you peeking to make a website?
Starting a website can be a scary thought, specifically when you’re not techy. Don’t worry, you’re not alone.
Having assisted over 400,000+ people make a website with WordPress, we have determined to create the most complete step-by-step guide on how to create a WordPress website without learning how to code.
This guide is useful for users of all ages and skill levels. However, if you need assistance, then you can contact our expert team to help you set up your website for free.
What Do I Need To Make A Website?
You’ll require the following three things to begin your WordPress site.
- A domain name – this is the name of your website, such as google.com
- WordPress hosting – this is where your website files are kept.
- 45 minutes of your undivided attention.
we’ll show you how to make a WordPress website in just nine simple steps.
Get Web Hosting and a Domain Name
The first step is to get web hosting when building a WordPress website. While WordPress is a free website builder, you should utilize a web hosting service for your site for it to be available on the web. Generally, it commands under INR 830 per month, getting web hosting first, can save both time and money as the best WordPress hosting services include a free domain name along with one-click installation to make the method of making a WordPress site much easier.
Choose a Domain Name
If you select a hosting plan that includes a free domain name (e.g., businessname.com), such as DreamHost, then you will be directed to select a domain as a segment of your account registration process. If you don’t like to do this then directly buy a domain name from one of the best domain name registrars like GoDaddy or Google Domains and then manually connect your preferred domain name to your web hosting service.
When selecting a domain name, keep the following in mind:
- The shorter the more useful.
- Bypass numbers and dashes.
- Attempt to stick with .com, but there are other good options too.
- Avoid utilizing trademarked names and copyrighted material.
- Make certain the domain is available.
- Don’t use words that are hard to pronounce or spell.
For additional insights, learn more about how to choose a domain name for your business.
Install WordPress
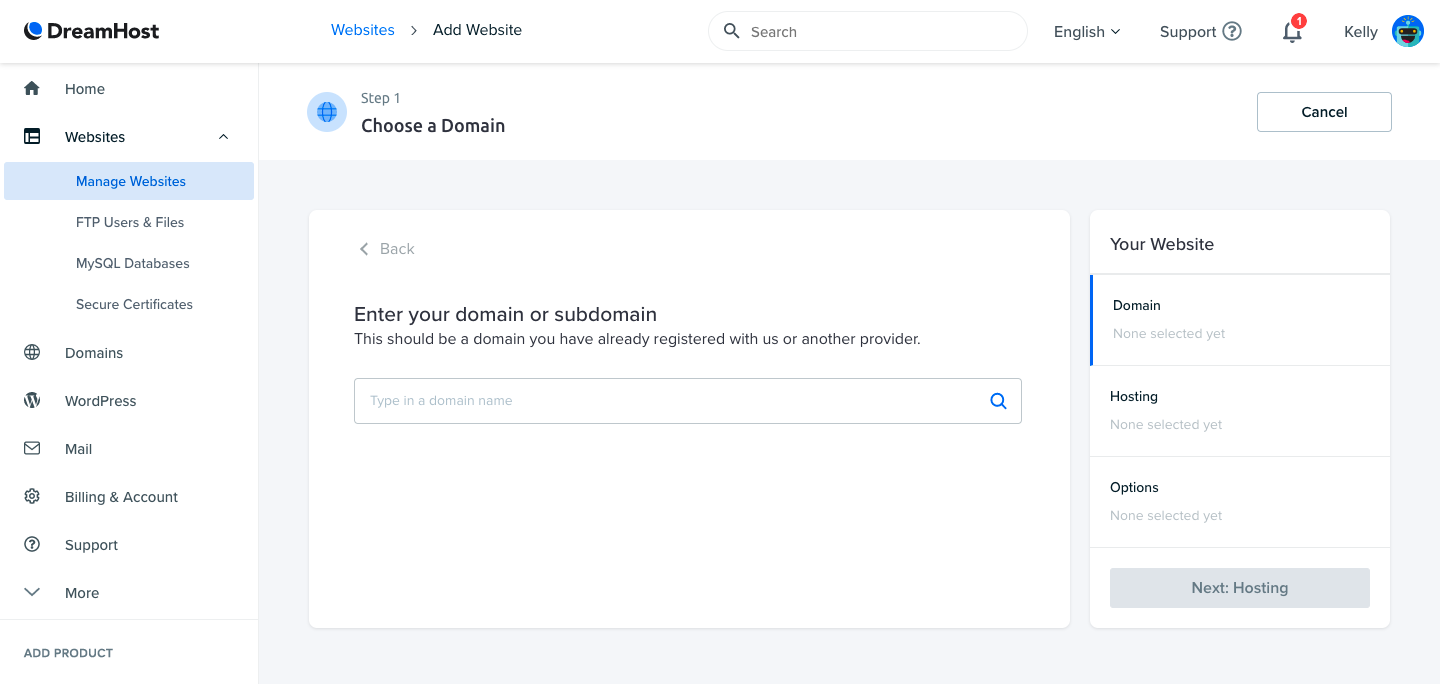
Once you complete your purchase of a web hosting plan, such as one from our famous, DreamHost, it’s time to install WordPress, simply link your web hosting service to WordPress. To do this, you have to go to your user dashboard (or cPanel), navigate to “Websites” from the vertical menu on your left-hand, then click “Manage Websites.” From there, find the site you like to build, click “Manage” and then lastly click “Install WordPress.”
Note that this procedure can take a few minutes and the steps will differ slightly by web hosting provider.
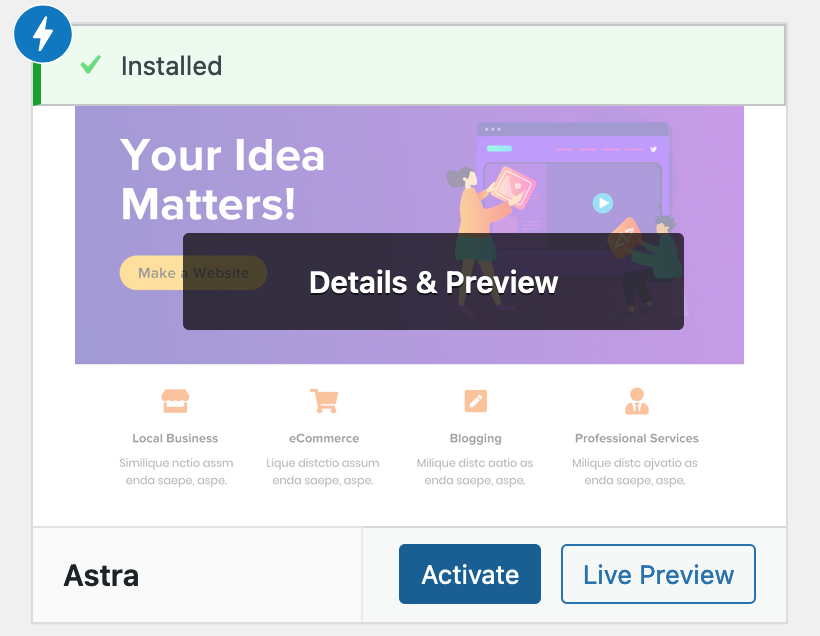
2. Find and Install a WordPress Theme
In the WordPress world, a theme is a website template. The templates control how your website is examined along with its processes and what it comes out of the box capable of. There are thousands of templates to choose from, with sites such as ThemeForest where you can browse and buy premium templates, so investing your time is worth it, find one that matches best the site you want to make. Once you find the best theme, buy it, and then download the theme files.
Also, you get free themes from WordPress. However, many times they need a lot more work, so in the long run it’s smart to invest in a well-designed premium theme.
Here’s how to install a premium WordPress theme:
- Navigate to your WordPress dashboard by signing in or logging in to your account (yourdomain.com/wp-admin).
- From the left panel, choose “appearance” and then choose “themes” from the menu section.
- Click “Add new” at the top of the page.
- Choose “upload theme.”
- Click “browse” and locate the zip file containing the theme files you downloaded upon buying.
- Lastly, choose “Install” and then click “Activate”
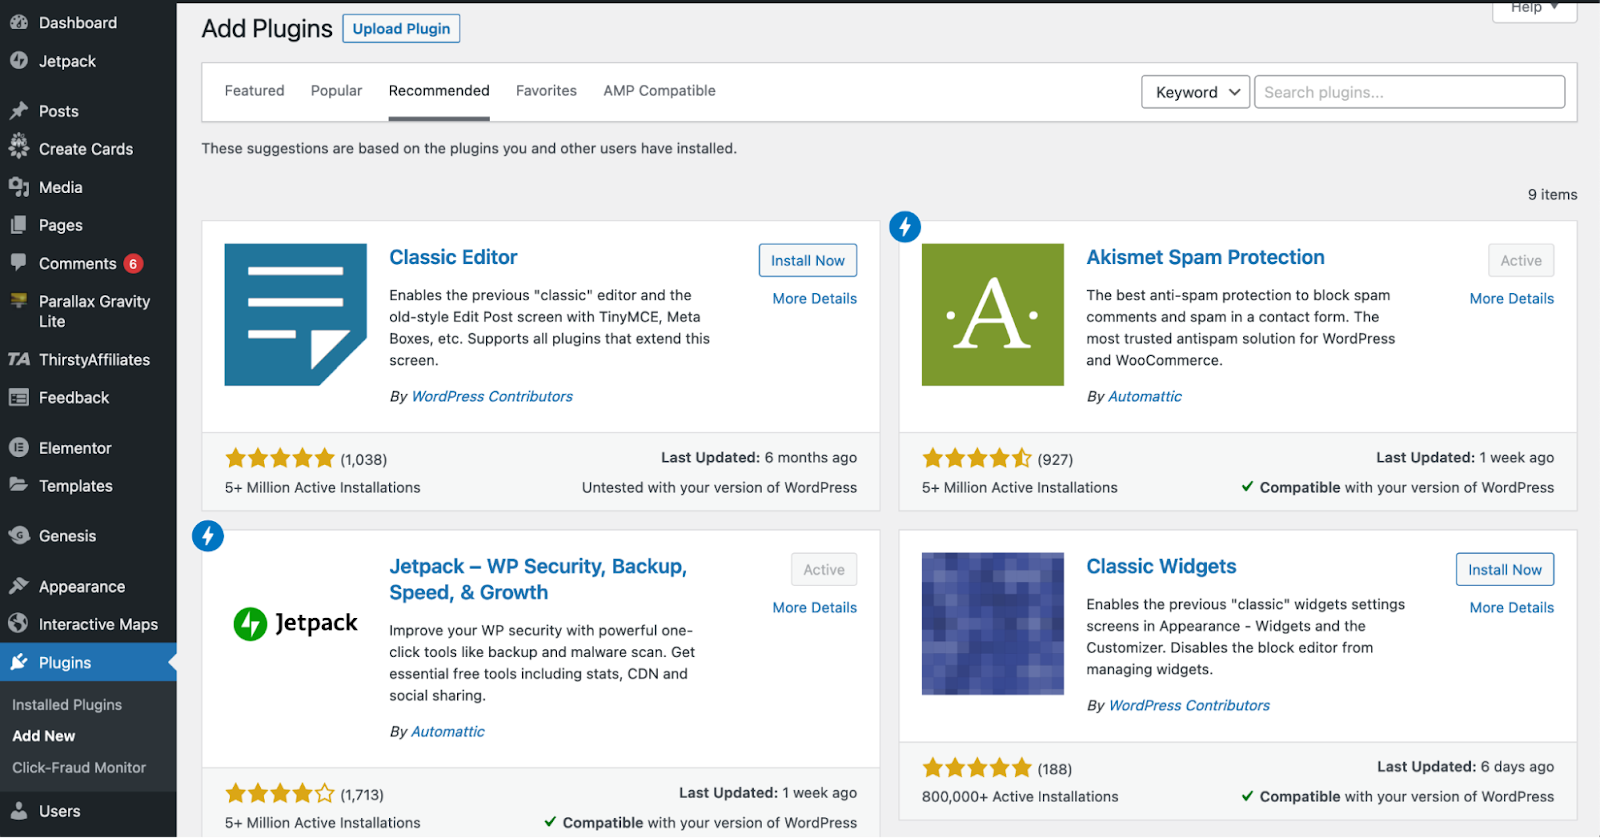
3. Install Plugins
After installing your theme, you require to install and activate all required plugins, which will allow you expand the functionality of WordPress. In addition to the plugins that come with your theme, there are thousands to choose from that can do anything from improving site security to adding live chat or turning your page editor into a drag-and-drop editor. However, you need to try to keep a restricted number of plugins you use as too many can sink your site a bit or cause other plugins to break.
For instance, we suggest the following plugins for every business website:
- Google Analytics: Follow your website’s activity and traffic. If you’re a blogger, this is a necessity as most brands won’t function with you if you don’t have this installed.
- Yoast SEO: This plugin allows you to optimize your posts for search engines.
- Jetpack: This plugin delivers security, maintenance, and performance enhancements for your website.
- Elementor: Utilize a page builder plugin, such as Elementor to transform your page editor into a more beginner-friendly drag-and-drop editor.
- Akismet: Save your website from spam comments.
Here’s how to install WordPress plugins:
- From your WordPress dashboard, pick “plugins” from the left-hand vertical menu.
- Click “add new” from the drop-down.
- Type in the plugin’s name you like to install.
- Click “install now” and then lastly click “activate.”
4. Configure WordPress Settings
Before you start customizing your web pages and building out website content, you are required to configure your settings, such as showing your homepage and blog posts page along with updating your site’s name, tagline, and icon.
Here’s how to configure the most typically used settings:
- Logo: Go to “Appearance” > “Customize” > “site identity > “modification logo” > upload your logo.
- Site title: Go to “Appearance” > “customize” > “site individuality > input site title (a.k.a. your business name).
- Site tagline: Go to “Appearance” > “customize” > “site individuality > input site tagline (or simply delete the default WordPress tagline).
- Site icon: Go to “Appearance” > “customize” > “site individuality > under “site icon” click “change photo” > upload the image you like to show as your site icon (a.k.a. favicon).
- Homepage: Go to “Appearance” > “Customize” > “Homepage settings” and choose the webpage you like to set as your homepage.
- Blog: Go to “Appearance” > “Customize” > “Homepage settings” and under “Posts page” like the page you like to set as your blog.
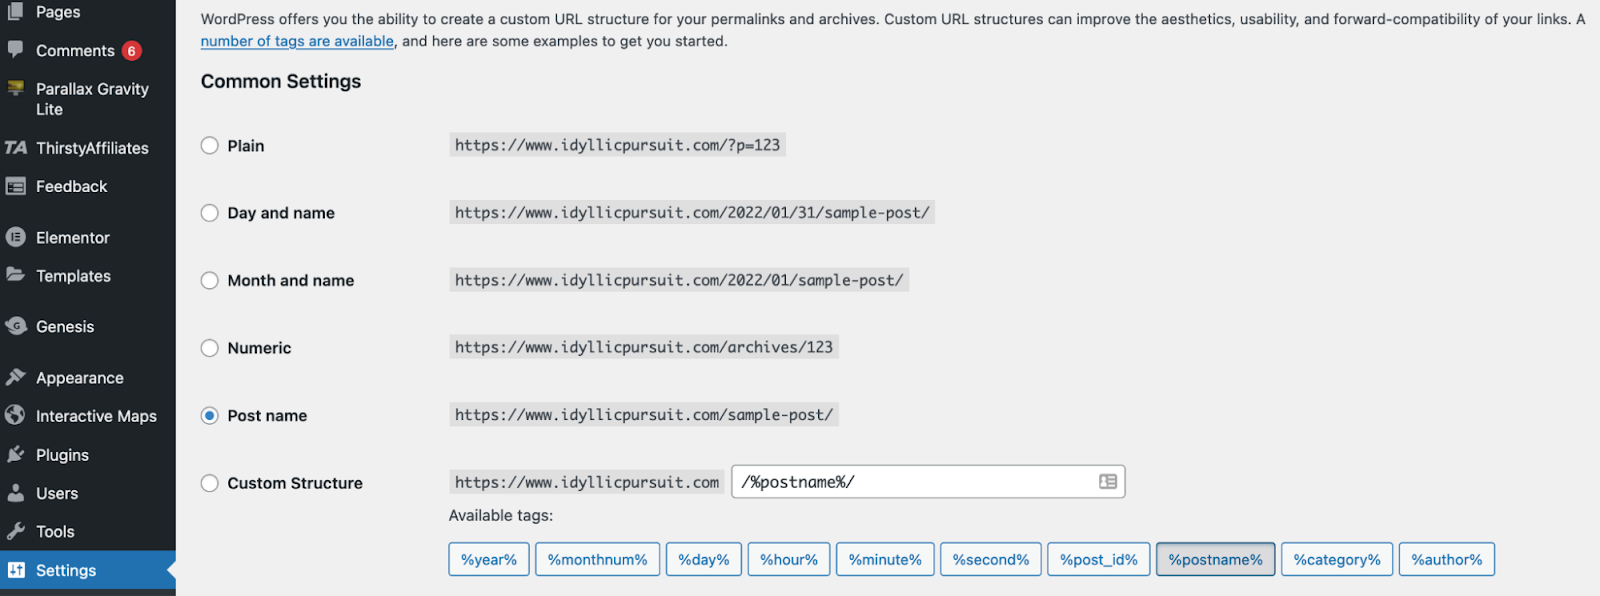
- Permalink settings: Go to “settings” > “permalinks” then select your preferred structure (typically “post name”) and save modifications.
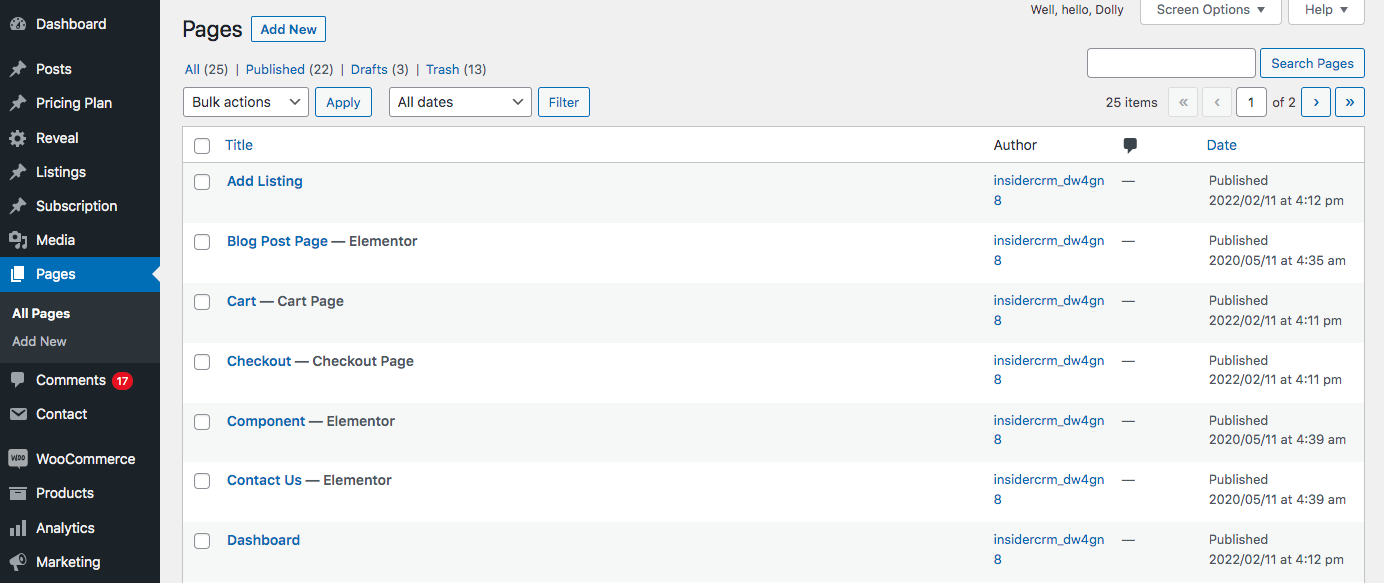
6. Create Pages
It’s time to make your web pages, which are what websites are made up of. For example, a business website on average includes several pages, such as the homepage, about, pricing, services, and contact. In WordPress, every page that isn’t a blog post is regarded a page.
Here’s how to make and/or customize pages in WordPress:
- From the WordPress dashboard, visit to “pages” from the left-hand vertical menu.
- To make a new page, click “add new.”
- To customize an existing page, go to “all pages” and then find the page from the list of pages, and click “edit.”
- If you have installed a page builder plugin, choose the option at the top to edit with the page builder (e.g., “edit with Elementor”).
- Write your website copy and customize your pages.
- When you’re done, click post.
- Repeat these steps for any other pages you like to make.
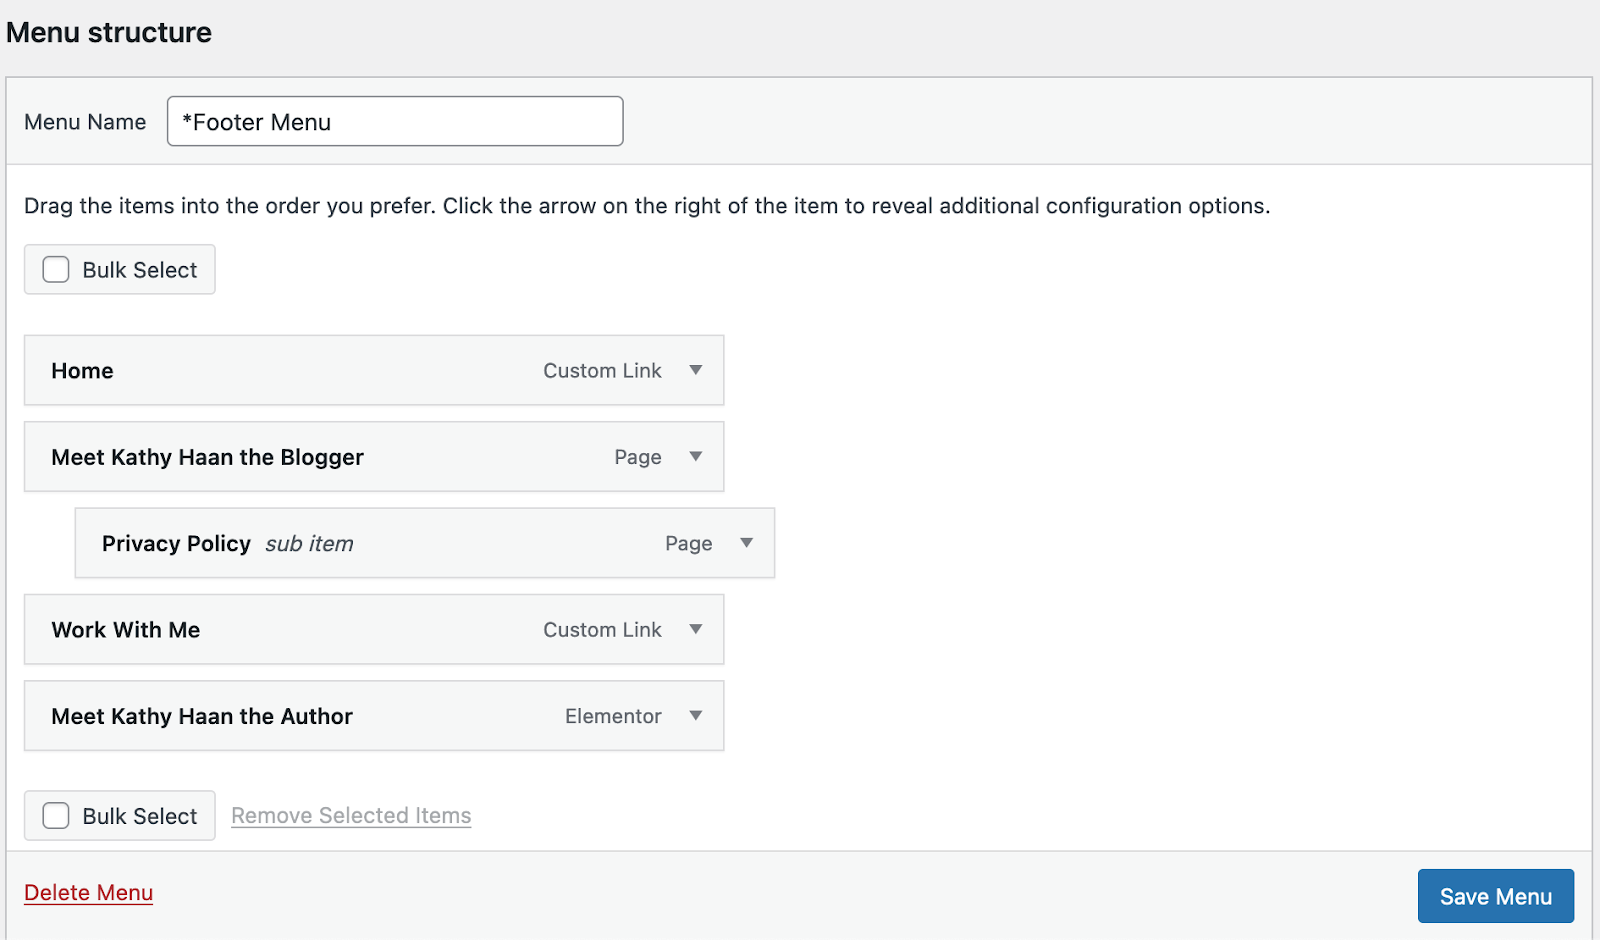
7. Set Up Your Menu
Now that you’ve placed up your pages, design and construct your menu. This is how users navigate through your site, Depending on your theme, you may have quite a few menus (such as a menu at the top of the site and one in the footer).
Here’s how to configure your site menu:
- From your dashboard, go to “appearance” > “menus.”
- To add pages, choose the page from the left-hand list.
- Click and hold pages to re-order your menu or to nest pages as sub-pages below others.
- Click on save modifications.
Once you have set up your menu, scroll down on the same page and locate the section named “menu settings.” Under the section “display location” review the box next to “primary.” This will set the menu as your website’s main menu that will be shown on your header.
8. Write Your First Blog Post (Optional)
In addition to web pages, many businesses also choose to add blog posts to help enhance their probability of getting seen in search engines, such as Google. To write a blog post, first go to “posts” from the vertical menu on your left-hand and hit “add new.” From there, you can write or edit the blog post the way you would a web page. The only distinction is, that, unlike a page, you can write a blog post and then schedule it to publish at a later date.
Here’s how to make a blog post in WordPress:
- Choose “posts” from the left panel of your dashboard and click “add new.”
- Type in your post’s name.
- Select the category you like to put it in.
- Write your blog content.
- Once you’re accomplished with it, click publish.
Note that if you’re not able to see your blog posts show up on your site, you might need to review that you’ve indicated your blog page to WordPress. To do this, go to “appearance” > “customize” > “homepage settings.” From there, find “posts page” and select the page you like to set as your blog.
- Market Your Site
Last, but not least, you should plan to market your website. The reasoning behind it is, that websites are not necessarily a “build it and they will come”-type of thing. Instead, businesses that are readily found online are those that have funded in a variety of methods of website marketing to assist their site obtain online visibility, which will help drive audiences to your site.
Here are a few of the most useful ways to market your site:
- Submit your website’s URL to Google Search Console to help it rank directly.
- Make your website’s social media accounts and include links in your posts (e.g., a Facebook Business Page, an Instagram account, or a Pinterest business account).
- Submit your website to applicable online directories.
- Make a Google My Business account to get found in local search.
- Add your business to the Better Business Bureau.
- Add your URL to your email signature, business cards, or any other marketing materials you’re going to operate.
The best method to market your website is to use a variety of these techniques, giving your site maximum exposure and the best chances of getting found online by the users.
WordPress Advantages
WordPress is the most famous blogging platform, with 43% plus of the internet utilizing it. It is famous for a reason. WordPress is utilized to construct websites, complex portals, blogs, business websites as well as applications, everything comes with tremendous flexibility and customization options. The WordPress.org software is open-source and free, making it a coder’s dream. WordPress is also certified by a large community of users and developers who are always keen on making new plugins, widgets, themes, and other goodies to add value to the experience.