

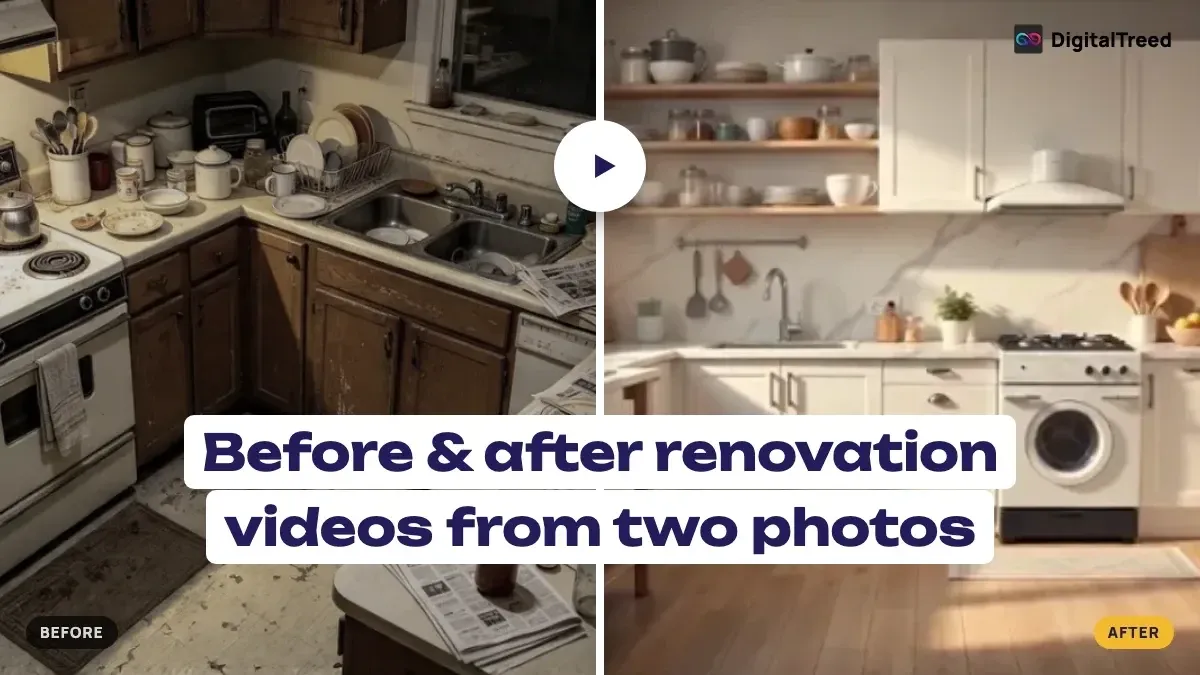
A renovation’s true impact rarely comes through in a static side-by-side photo comparison the way it does when you can actually watch a space transform in front of you. Being able to turn images into videos gives contractors, designers, and homeowners a genuinely compelling way to showcase that transformation, turning two flat “before” and “after” shots into a single flowing reveal.
Dreamina, powered by its advanced Seedance 2.5 video generation model, handles this kind of structural, spatial transformation with real visual coherence. Here’s how to build a renovation reveal that actually lands with impact.
Quick answer
To make a before-and-after renovation video, shoot two photos from the same angle and distance, upload the “before” photo to an image-to-video tool such as Dreamina, and describe the change second by second: hold on the old room, let the new finishes appear gradually, then hold on the result. Pick 16:9 for YouTube or 9:16 for Reels, then upscale and add music before you export.
Key takeaways
- Matched photos from one angle make the smoothest transformation
- Pace the reveal: pause on “before”, change gradually, hold on “after”
- Seedance 2.5 changes finishes while walls, windows and layout stay put
- One strong clip works as portfolio, social ad and client pitch
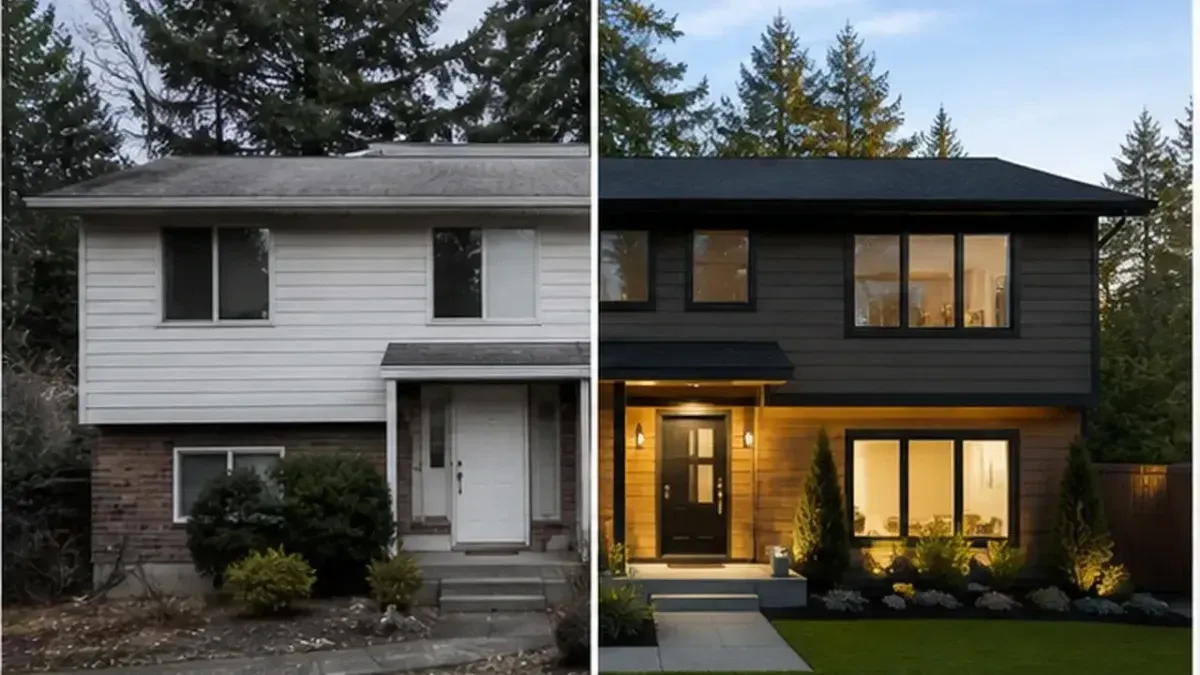 The same house from the same angle, before and after: the kind of matched pair a transformation video needs.
Why a moving transformation outperforms a static comparison
A side-by-side photo asks the viewer to mentally reconstruct the change, jumping back and forth between two images. A video transformation does that work for them, letting the eye travel smoothly from dated and cluttered to fresh and finished, which creates a far stronger emotional “wow” reaction.
Note
By the numbers: homeowners are spending real money on exactly these rooms. According to the 2026 U.S. Houzz & Home Study, kitchens had the highest median renovation spend in 2025 at $24,000, up from $22,000 in 2024, and 67% of renovating homeowners took on interior rooms such as kitchens and bathrooms. A clip that shows that spend turning into a finished room is exactly what future clients want to see.
Preparing matched before and after photography
The strongest renovation videos start with two photos shot from the same angle and distance, before the work begins and after it’s complete. This consistency gives the video generation something stable to transition between, rather than trying to reconcile two completely different compositions.
Planning the reveal’s emotional pacing
A few structural choices shape how satisfying the transformation feels:
- A brief pause on the “before” state to let its flaws register
- A smooth, continuous transition rather than an abrupt cut
- A confident hold on the finished “after” state at the end
- Camera movement that echoes a real walkthrough, not a static zoom
What Seedance 2.5 brings to transformation content
Seedance 2.5’s support for precise local editing proves especially valuable here, since a convincing renovation reveal often depends on specific elements (cabinetry, flooring, wall color) changing accurately while the room’s actual structure (windows, doorways, layout) stays exactly where it should.
Its improved video extension quality also matters for longer walkthroughs, keeping visual consistency intact even as a sequence stretches across multiple connected rooms rather than degrading with each extension.
And with single clips now supporting up to 30 seconds, a full before-to-after arc can unfold with genuine pacing rather than feeling rushed into a few abrupt seconds.
Your 3-step transformation reveal with Dreamina
Step 1: Write a text description and add a reference image
Visit Dreamina, sign in, and head to the AI Video section. Click “Add reference image” to upload your “before” photo, then write a prompt describing how the space should transform over time.
A strong 30-second sample prompt might read:
Reference the cluttered kitchen layout and camera angle from the uploaded image. 0-5 seconds: hold steady on the dated, worn kitchen as it is now. 6-20 seconds: cabinets smoothly repaint from worn brown to crisp white, countertops shift to clean marble, and lighting brightens gradually. 21-30 seconds: hold on the fully renovated kitchen, bright and finished, camera gently pushing forward.
Describing the transformation stage by stage keeps the result feeling like a genuine, gradual reveal.
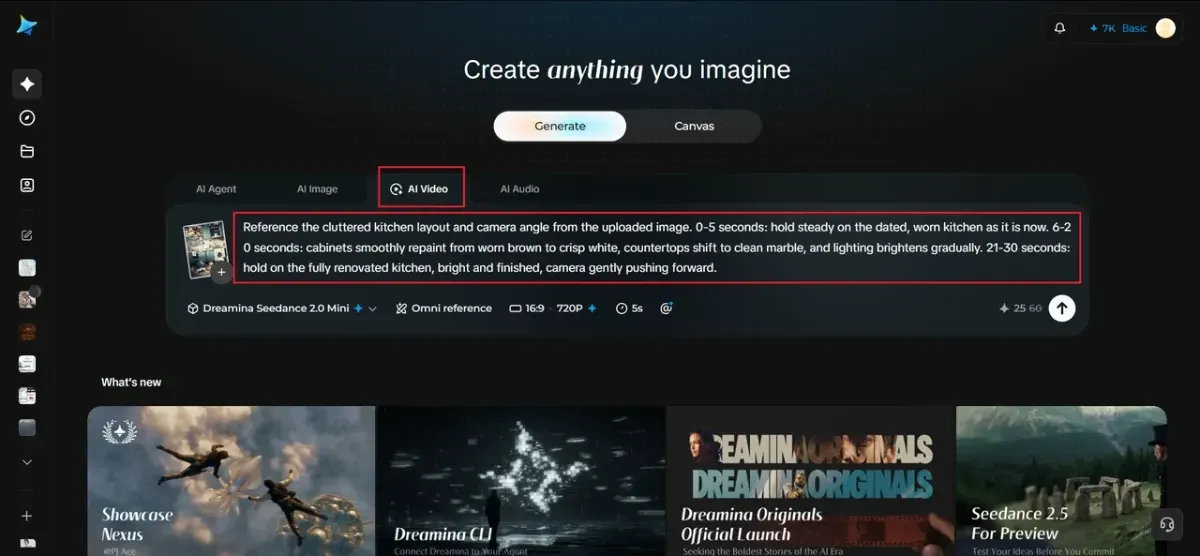 Step 1: the “before” photo as the reference image, and a prompt that times each stage of the change.
Step 2: Generate your video
After adding your image and prompt, choose the Seedance 2.5 model for generation. Next, choose your video length, then a suitable aspect ratio: 16:9 suits a YouTube portfolio showcase, while 9:16 works well for Instagram Reels and TikTok renovation content. Finally, click generate and wait a few seconds for processing.
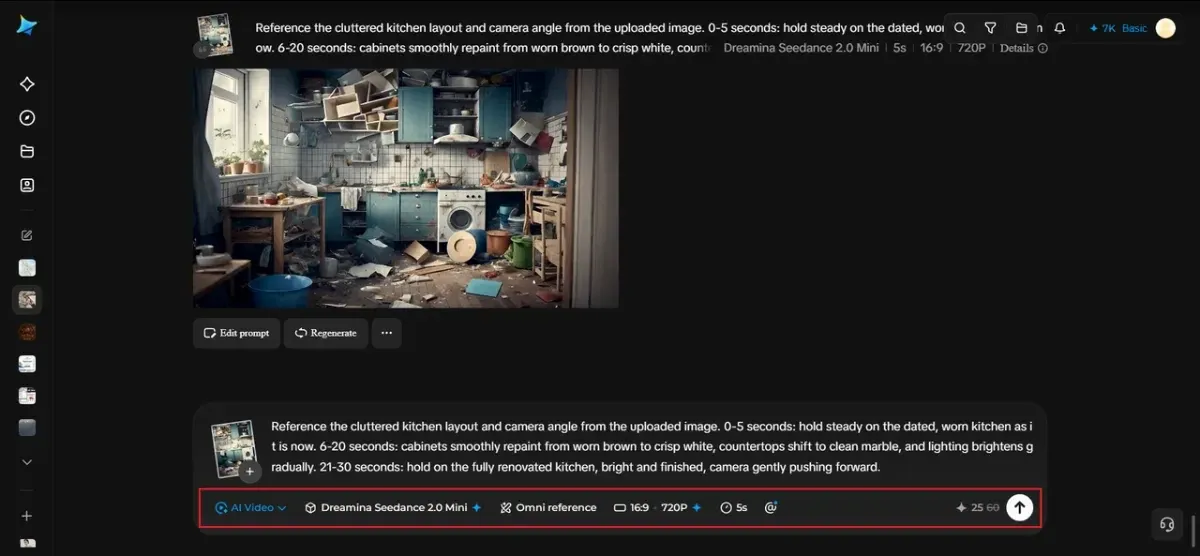 Step 2: pick the model, the clip length and the aspect ratio, then generate.
Step 3: Enhance and export the video
Polish your clip before saving it using Dreamina’s AI editing tools. Use advanced tools like Upscale for crisp, high-resolution detail that shows off fine finish work, or Generate soundtrack to add an uplifting musical backing to the reveal. Finally, export and share it across social platforms or client presentations.
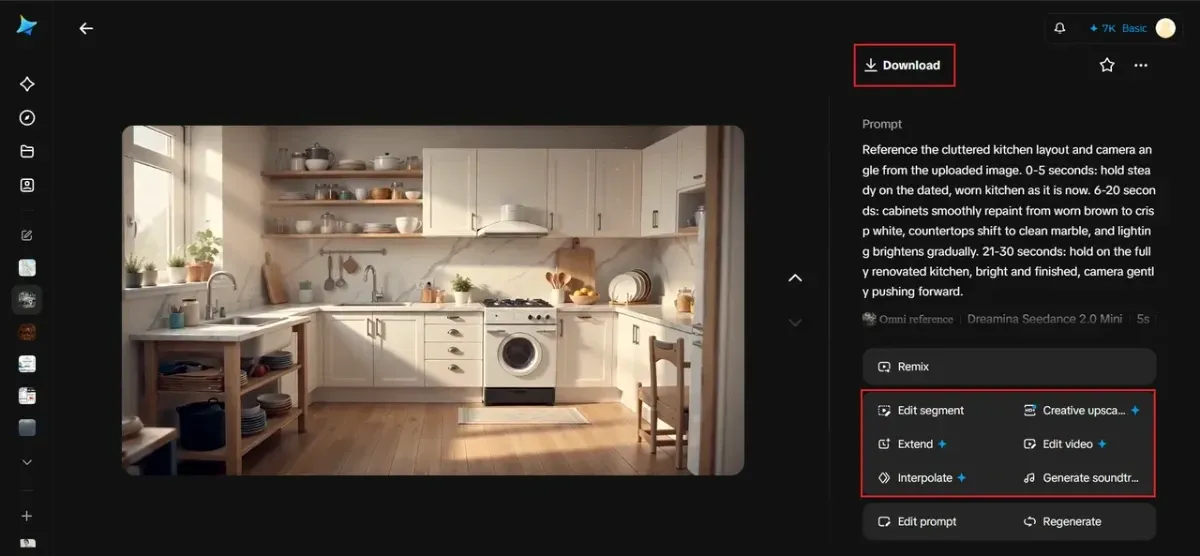 Step 3: the finished kitchen, ready to upscale, add a soundtrack and download.
Showcasing multiple rooms in one connected sequence
Once single-room transformations work well, sequencing several (kitchen, bathroom, living room) back to back within one longer video builds a genuinely comprehensive renovation story, giving potential clients a full sense of a contractor’s range in one sitting.
Matching lighting changes to the actual renovation
A renovation rarely changes just surfaces; it often changes how light fills a room entirely. Describing this shift directly in your prompt, dim and shadowed becoming bright and sunlit, reinforces the transformation’s emotional impact well beyond the materials alone.
Adding context with a brief establishing moment
Opening the video with a one- or two-second wide shot establishing the room’s original layout, before the transformation begins, helps viewers orient themselves, which is especially useful for larger spaces where the camera angle might shift slightly during the reveal.
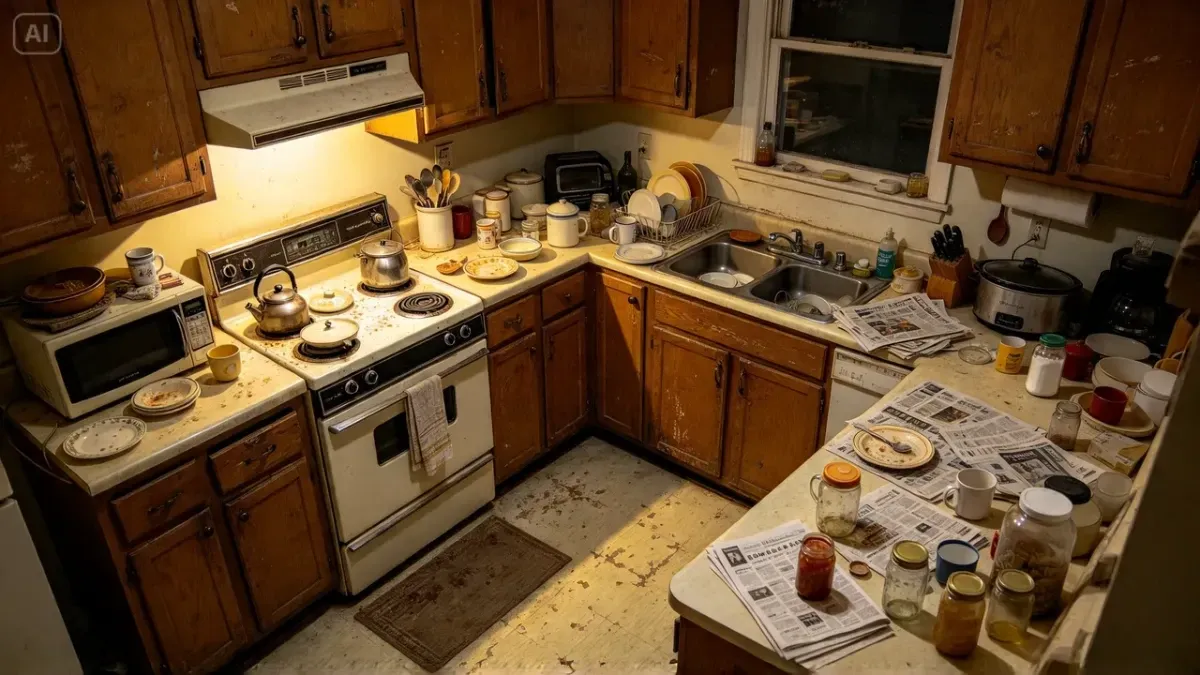 A wide “before” shot like this one sets the scene before the transformation starts.
Where renovation transformation videos earn real results
This kind of visual storytelling delivers genuine practical value:
- Contractor and interior designer portfolio and marketing content
- Real estate listings highlighting renovation potential
- Social media content building a renovation business’s following
- Client presentations pitching a proposed transformation concept
Using the finished video across your whole marketing funnel
A single strong transformation clip rarely needs to live in just one place. The same video works as a website portfolio centerpiece, a paid social ad, and a client pitch deck opener, making it worth investing real care into getting one reveal genuinely right rather than rushing out several mediocre ones.
Frequently asked
How do I make a before-and-after renovation video from photos?
Take two photos from the same angle, upload the “before” photo to an image-to-video tool such as Dreamina, describe the change in timed stages in the prompt, pick a model, length and aspect ratio, then generate, upscale and export.
Which aspect ratio is best for a renovation video?
Use 16:9 for YouTube and your website portfolio, and 9:16 for Instagram Reels and TikTok. Make one version for each if you post in both places.
How long should a before-and-after video be?
Around 15 to 30 seconds per room: a few seconds on the “before”, a gradual change in the middle, and a few seconds holding on the finished room. Seedance 2.5 supports single clips of up to 30 seconds.
Why do my before and after photos need the same angle?
Matched framing gives the video model one stable layout to transform, so walls, windows and doorways stay in place while the finishes change. Different angles make the result look like a jump cut.
Final thoughts
A renovation’s real impact comes alive the moment a viewer can watch the change happen, and the ability to turn images into videos makes that kind of compelling reveal genuinely achievable from nothing more than two well-matched photos.
With Dreamina and its advanced Seedance 2.5 video generation model, a dated space and its finished version can be woven into one satisfying transformation.
Match your before and after shots carefully, pace the reveal with real intention, and let Dreamina help your renovation story land with genuine impact.


Comments
No comments yet. Start the conversation below.